Building coils isn’t about saving money; it’s about seizing control of the very physics of flavour.
- A coil’s performance isn’t magic; it’s a direct result of its mass, surface area, and the mechanical purity of its materials.
- Pre-built coils are mass-produced for convenience, not for articulating the specific, delicate notes within your premium e-liquid.
Recommendation: Master these core principles, and you’ll transition from being a consumer to a creator of your own perfect vape.
There’s a frustration familiar to every dedicated vaper. You invest in a complex, top-shelf e-liquid—a Madagascan vanilla custard with notes of toasted almond, perhaps—only to have it taste flat, one-dimensional, and vaguely sweet through a brand-new, £5 pre-built coil head. Friends and forum posts offer the same advice: « You should build your own coils! The flavour is so much better. » They might mention it’s cheaper in the long run, or that you can « customise » your vape, but these explanations barely scratch the surface.
What if the real reason your hand-wrapped coil tastes superior has less to do with cost and more to do with craft? What if the secret lies not just in getting ‘better’ flavour, but in becoming an artisan of sensation? The truth is, building a coil is an exercise in applied physics. It’s about meticulously controlling the relationship between heat, mass, and surface area to create an engine perfectly tuned to a specific purpose. A pre-built coil is a one-size-fits-all compromise; a hand-wrapped coil is a bespoke key, crafted by you, to unlock the hidden layers of flavour in your chosen liquid.
This guide moves beyond the platitudes. We won’t just cover the ‘how’; we will delve into the ‘why’. You will learn to think like a coil builder, understanding the tangible science behind the sublime experience of a perfect vape. It’s time to stop just vaping and start crafting.
To help you navigate this journey from consumer to creator, we’ve broken down the essential knowledge into distinct, digestible sections. This structured approach will guide you through the core principles and advanced techniques that define the artisan’s craft.
Summary: The Artisan’s Guide to Superior Coil Performance
- Why 6 Wraps at 3mm Gives Different Resistance Than 6 Wraps at 2.5mm?
- Which Wire and Gauge Combination Delivers Best Flavour Under 0.5 Ohms?
- How to Wrap Coils With Perfectly Even Spacing Without Special Tools?
- The Glow Test Technique That Reveals Hidden Hotspots in 10 Seconds
- How Much Cotton Is Too Much: The Wicking Density Sweet Spot for RDAs?
- 24-Gauge or 28-Gauge Kanthal: Which Matches Your Low-Wattage MTL Style?
- Why Cloud Competitions Require Dual Coils at 0.1 Ohms Minimum?
- Why Does Your Kanthal Coil Taste Metallic While Your Friend’s Tastes Clean?
Why 6 Wraps at 3mm Gives Different Resistance Than 6 Wraps at 2.5mm?
The first step in becoming a coil artisan is understanding a fundamental principle: a coil is simply a length of resistive wire. Its final resistance is determined almost entirely by its material type, its thickness (gauge), and its total length. This is where the inner diameter becomes the silent architect of your vape experience. Imagine two coils, both with 6 wraps. The one wrapped around a 3mm rod is using significantly more wire to make its journey than the one on a 2.5mm rod. More wire equals more material for electricity to travel through, which means higher resistance. A simple fact with profound consequences.
This difference in length and diameter directly impacts the coil’s mass. A 3mm coil has more mass, creating what artisans call a ‘thermal flywheel’. It takes slightly longer to heat up (ramp-up time) but holds that heat more steadily, producing a smoother, warmer, and often denser vapour. Conversely, the 2.5mm coil, with its lower mass, is more responsive. It heats up and cools down faster, delivering a sharper, more aggressive vape. This isn’t a matter of ‘better’ or ‘worse’; it’s about intention. Are you chasing the dense, lingering warmth of a dessert flavour, or the sharp, bright top notes of a citrus blend?
As the Vapour Core guide confirms, a core tenet of coil building is that « the bigger the inner diameter of the vape coil, the higher its resistance is. » Understanding this allows you to manipulate not just the ohms on your screen, but the very character of the heat your coil produces. The following comparison, based on data from a detailed analysis of vape wire properties, makes this clear.
| Coil Specification | 2.5mm Diameter (6 wraps) | 3mm Diameter (6 wraps) |
|---|---|---|
| Wire Length | Shorter | ~20% Longer |
| Coil Mass | Lower | Higher (Thermal Flywheel) |
| Resistance | Lower | Higher |
| Ramp-Up Time | Fast & Responsive | Slower & Stable |
| Heat Flux (same wattage) | Higher (aggressive vape) | Lower (cooler vape) |
| Best For | Sharp flavor notes, quick hits | Smooth heat output, dense vapor |
Ultimately, the diameter of your coil rod is one of your primary tools for defining the vape experience before you even press the fire button.
Which Wire and Gauge Combination Delivers Best Flavour Under 0.5 Ohms?
If diameter is the architect, then the wire material is the soul of your coil. For sub-ohm vaping (below 1.0 ohm), where the goal is often rich flavour and satisfying vapour, the choice of wire is critical. The common wisdom simply lists the options: Kanthal, Nichrome (Ni80), Stainless Steel (SS316L). The artisan, however, knows that each material has a distinct personality and a unique ability for flavour articulation. They don’t just heat up; they express different facets of your e-liquid.
Kanthal (KA1) is the reliable workhorse. It’s easy to work with and stable, but it has a slower ramp-up time. This can result in a more ‘baked’ flavour profile, which can be fantastic for rich custards and bakeries. On the other hand, Ni80 and SS316L are more responsive. They heat up almost instantly, which is perfect for capturing the delicate, volatile top notes of fruits, florals, and menthols. A comprehensive wire comparison confirms that many vapers report better flavour with nichrome and stainless steel compared to Kanthal for this very reason—their speed prevents those fragile notes from being ‘cooked away’.
The gauge (thickness) of the wire adds another layer of control. A lower gauge number (e.g., 24g) is thicker, has more mass, and creates that ‘thermal flywheel’ effect. A higher gauge (e.g., 28g) is thinner, has less mass, and is more responsive. For a flavour-focused build under 0.5 ohms, a fused Clapton or Alien coil made from 24g or 26g Ni80 or SS316L is often the gold standard. It combines the rapid heating of the material with a large, textured surface area, vaporising liquid efficiently across a wide front for a dense, nuanced taste.
Think of your wire choice as pairing a wine with food. You wouldn’t serve a heavy red with a delicate fish. Similarly, you should match your wire to your e-liquid profile:
- For Fruits/Menthols (delicate top notes): Use Ni80 or SS316L single-core Claptons in 26-28 gauge for fast ramp-up and sharp flavour definition.
- For Desserts/Custards (rich base notes): Choose Kanthal or SS316L Fused/Alien Claptons in 24-26 gauge for higher mass and a warmer, denser vapour that enhances richness.
- For High-VG Liquids (70%+ VG): Select spaced Clapton or Alien coils with superior wicking channels to prevent dry hits at sub-0.5 ohm builds.
By moving beyond ‘Kanthal is for beginners’ and understanding the unique properties of each material, you gain the power to precisely tailor the heat and response of your coil to the liquid you want to enjoy.
How to Wrap Coils With Perfectly Even Spacing Without Special Tools?
You’ve chosen your wire and diameter. Now comes the moment of creation. One of the biggest differentiators between a mediocre coil and an exceptional one is the consistency of its wraps. Uneven spacing leads to uneven heating, creating ‘hotspots’ that scorch your e-liquid and ‘cold spots’ that do nothing at all. The result is a messy, inconsistent vape. While coil jigs with spacing guides exist, a true artisan can achieve perfection with a simple, elegant technique that requires nothing more than a spare piece of thin wire.
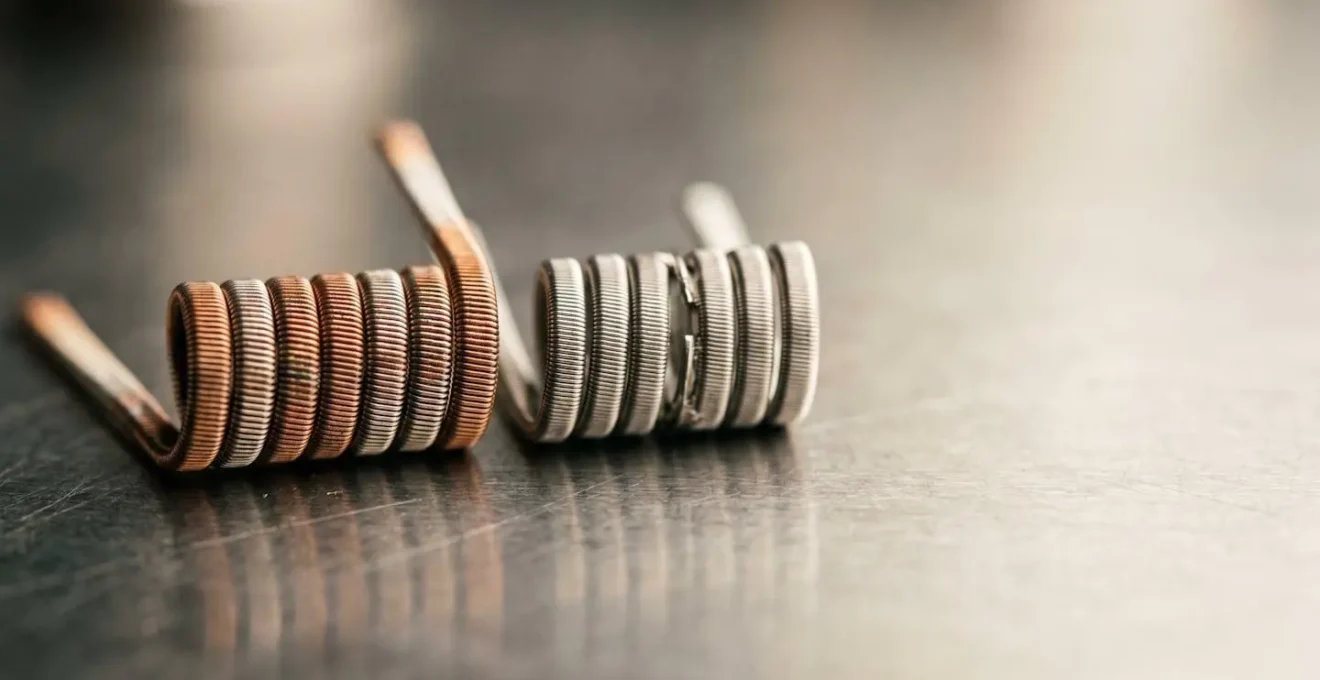
This is the Parallel Spacer Wire Technique. The concept is brilliantly simple: you wrap your main coil wire and a much thinner ‘sacrificial’ wire together, side-by-side. After wrapping, you simply unwind and remove the thin spacer wire, leaving behind perfectly uniform gaps between each wrap of your main coil. The beauty of this method is its precision. The thickness of the spacer wire dictates the exact width of the gap, giving you repeatable, flawless results every time.
As the image above demonstrates, this technique forces a level of precision that is difficult to achieve by hand-pulling and adjusting. The process itself is a satisfying ritual:
- Step 1: Cut equal lengths of your main wire (e.g., 26g Kanthal) and a sacrificial spacer wire (a very thin 32g or 34g wire is ideal).
- Step 2: Hold both wires perfectly parallel and wrap them simultaneously and tightly around your coil rod.
- Step 3: Once your desired number of wraps is complete, carefully grip the end of the thin spacer wire with tweezers.
- Step 4: Gently unwind and pull the spacer wire out from the coil. It will slither out, leaving behind your masterwork: a perfectly spaced coil.
This isn’t just about aesthetics; it’s about creating the ideal conditions for even heat distribution, which is the absolute foundation of clean, consistent flavour.
The Glow Test Technique That Reveals Hidden Hotspots in 10 Seconds
Your coil is wrapped and installed on the deck. It looks perfect. But looks can be deceiving. The most crucial quality control step in the artisan’s process is the glow test. This is where you diagnose the coil’s health and performance before it ever touches cotton or e-liquid. A proper glow test isn’t just about making the coil red; it’s about reading its language of heat and correcting the tiny imperfections that ruin flavour. A rushed or skipped glow test is the number one reason a handmade coil underperforms.
The correct method is the Pulsed Ascending Glow. Instead of holding down the fire button, you use very short, low-wattage pulses (10-15W is plenty) to gently bring the coil up to temperature. What you are looking for is a slow, even glow that originates from the absolute centre of the coil and spreads outwards to the legs simultaneously. Any deviation from this pattern reveals a problem.
- A leg glowing first? This indicates a problem with the connection at the post. Check that your post screws are tight and that both legs of the coil are of equal length.
- A single wrap glowing brighter than the rest? You have a hotspot. This is a point of concentrated resistance, often caused by a slight deformation in the wrap.
- The coil glowing from the outside in? This is a major issue, often meaning the legs are too long or there’s a short somewhere.
When you identify a hotspot, the fix is delicate. While pulsing the coil at low wattage, gently ‘strum’ the wraps with ceramic-tipped tweezers (never metal, as it will cause a short). This tiny vibration helps redistribute the tension in the wire and encourages the wraps to heat evenly. The goal is a deep, even orange glow. A bright yellow or white glow means you’re using too much power and risk degrading the wire itself. Though building a coil only takes about 10-15 minutes once practiced, spending 30 seconds on a meticulous glow test is the most valuable part of that time.
This is your final check, ensuring that the engine you’ve built will run smoothly, efficiently, and deliver the clean, pure flavour you set out to achieve.
How Much Cotton Is Too Much: The Wicking Density Sweet Spot for RDAs?
You can build the most technically perfect coil in the world, but if the wicking is wrong, the flavour will be a disaster. Wicking is the art and science of delivering e-liquid to the coil, and it’s governed by a delicate balance. Too little cotton, and the coil will run dry, causing a horrific burnt hit. Too much cotton, and you choke the flow of liquid, leading to muted flavour and, eventually, a dry hit. This is the realm of wicking dynamics, and mastering it is crucial for a rebuildable dripping atomizer (RDA).
The golden rule is this: the cotton should be snug inside the coil, but not tight. You should feel a slight resistance when pulling it through, but it shouldn’t deform the coil’s shape. This ensures perfect contact between the cotton and the entire inner surface of the wire. However, the real artistry happens when you trim the tails. As a wicking guide wisely notes, « Cotton expands when it’s wet. If you use too much, your wick will expand and prevent the e-liquid from flowing freely. » This insight is the key to the most effective wicking method for RDAs: the ‘Bow-Tie’ Cut.
This technique creates a density gradient in your wick. The centre, inside the coil, remains dense for good contact. The tails, however, are thinned out and fluffed. This allows the ends that sit in the juice well to be highly absorbent and less dense, creating an unrestricted channel for capillary action to draw liquid up to the coil. It’s the best of both worlds: a firm core for vaporisation and fluffy tails for rapid replenishment.
Cotton expands when it’s wet. If you use too much, your wick will expand and prevent the e-liquid from flowing freely.
– ComeToVape Wicking Guide, Wicking Tips and Techniques: Get the Most out of your Wicks
To achieve this, follow these steps:
- Thread your cotton through the coil with that signature ‘slight resistance’.
- Cut the tails so they will just touch the bottom of the RDA’s deck.
- Using sharp scissors or tweezers, thin and comb out the ends of the cotton tails, removing about a third of the material to create a taper.
- Gently fluff these thinned ends and tuck them into the juice well without compressing them.
This careful management of wicking dynamics ensures your perfectly built coil is never starved of liquid, allowing it to perform at its peak, hit after hit.
24-Gauge or 28-Gauge Kanthal: Which Matches Your Low-Wattage MTL Style?
Not all vaping is about massive clouds. For many, the goal is to replicate the classic cigarette draw—a tight, flavourful, Mouth-to-Lung (MTL) experience. In this low-wattage world (typically 10-15W), the rules of coil building change dramatically. The concept of a ‘thermal flywheel’ is now your enemy. Here, the pursuit is for responsive mass—a coil that heats up instantly with minimal power, delivering a crisp, immediate burst of flavour.
This is where the distinction between 24-gauge and 28-gauge Kanthal becomes critical. While both are Kanthal, their performance in an MTL setup is night and day. A 24-gauge wire is relatively thick. At low wattage, it’s sluggish and inefficient. It has too much mass to heat up quickly, resulting in a frustrating delay (ramp-up time) and a muted, ‘baked’ taste because the power isn’t sufficient to flash-vaporise the liquid. It’s simply the wrong tool for the job.
In contrast, a 28-gauge Kanthal wire is the MTL vaper’s best friend. Being much thinner, it has significantly less mass. It requires very little energy to reach vaping temperature, providing that sought-after instant response. The flavour is sharp and well-defined because the coil isn’t slowly stewing the liquid. Furthermore, its slim profile is less disruptive to the tight airflow path of a dedicated MTL atomiser, preserving the quality of the draw. This is why, as Vaping360 notes, a 26-28 gauge Kanthal wire is so dependable for MTL vapers that it’s hard to swap for anything else.
The choice is clear when you compare their characteristics for low-power use, as shown in this table derived from an expert guide on coil resistance.
| Characteristic | 24-Gauge Kanthal | 28-Gauge Kanthal |
|---|---|---|
| Wire Thickness | Thicker (0.51mm) | Thinner (0.32mm) |
| Mass & Thermal Inertia | High mass, slower response | Low mass, instant response |
| Ramp-Up Time (<15W) | Sluggish, delayed vapor | Fast, immediate vapor |
| Flavor Character | ‘Baked’ or muted at low power | Sharp, defined flavor notes |
| Coil Footprint | Larger, disrupts tight MTL airflow | Slim, preserves airflow integrity |
| Battery Efficiency | Higher energy demand | Significantly longer battery life |
| Best Use Case | High-wattage DTL (30W+) | Classic MTL (10-15W) |
Choosing a 28-gauge (or even 30-gauge) wire for your MTL build is a fundamental step in crafting a satisfying, responsive, and flavourful vape that honours the style.
Why Cloud Competitions Require Dual Coils at 0.1 Ohms Minimum?
At the opposite end of the spectrum from MTL vaping lies the world of competitive cloud chasing. Here, the goal is singular: produce the largest, densest cloud of vapour possible. This is a game of extremes, pushing hardware to its absolute limits, and it’s governed by a fascinating interplay of Ohm’s Law, battery safety, and fluid dynamics. The community-enforced standard of a 0.1 ohm minimum resistance for dual coil builds isn’t arbitrary; it’s a carefully derived floor that balances immense power with a shred of safety.
The primary driver is battery safety. High-drain 18650 batteries, the workhorses of mechanical mods used in competitions, have a Continuous Discharge Rating (CDR), typically around 20-30 Amps. Building below 0.1 ohms on a fully charged battery (4.2V) risks exceeding this CDR, which can lead to catastrophic battery failure. The 0.1 ohm floor became a community consensus to prevent this. Using the power formula (P=V²/R), a 0.1 ohm coil at 4.2V will draw a staggering 176 watts, which is right at the edge of what a top-tier battery can handle.
But why is this extreme low resistance necessary for clouds? It’s all about maximising the rate of vaporisation. A dual-coil setup at 0.1 ohms (meaning two 0.2 ohm coils running in parallel) offers a gigantic total surface area. When hit with nearly 200 watts of power, this massive surface heats up almost instantly, flash-vaporising a huge amount of high-VG liquid. This is the origin of the massive cloud. It’s a brute-force approach to a specific goal, where nuance is sacrificed for raw output. As coil resistance research shows, these low-resistance builds are purpose-built for huge clouds and intense Direct-to-Lung vaping.
The key principles are:
- Battery Safety: The 0.1Ω floor is a safety standard to prevent exceeding the battery’s CDR.
- Extreme Power: Low resistance allows the battery to deliver maximum wattage for instant, massive vaporisation.
- Surface Area Maximisation: A dual-coil configuration provides an immense surface area for the e-liquid to contact.
- Ramp-Up Synergy: Two parallel coils have less individual mass than a single coil of the same total resistance, allowing them to heat up faster.
While most vapers will never build this low, understanding the physics at play provides a deeper appreciation for the entire spectrum of the craft.
Key Takeaways
- Coil building is the craft of controlling physics; mass, diameter, and material dictate the character of your vape.
- Flavour articulation is intentional; fast-ramping wires (Ni80) suit fruits, while slower wires (Kanthal) enhance desserts.
- Mechanical purity is non-negotiable; a clean wire and a perfect glow test are the foundation of clean flavour.
Why Does Your Kanthal Coil Taste Metallic While Your Friend’s Tastes Clean?
We arrive at the most common complaint that drives people away from building: the dreaded metallic taste. You’ve followed every step, your coil glows perfectly, but the first puff tastes like you’re licking a coin. Meanwhile, your friend uses the same Kanthal wire and their vape is pure, clean flavour. The difference, in almost all cases, comes down to one core concept: mechanical purity. This isn’t just about the coil being ‘clean’; it’s about eliminating contaminants at every stage of the process, from the spool to the first fire.
The metallic taste is often the result of microscopic impurities on the wire’s surface burning off. This can be machine oil and drawing compounds from the manufacturing process, or simply the oils from your own skin. As a detailed analysis of wire manufacturing explains, not all wire is created equal. Cheaper, unbranded wire may have more surface contaminants, and this is where the artisan’s discipline comes in. You must assume all wire is ‘dirty’ and treat it accordingly.
Not all Kanthal A-1 is created equal. Different manufacturers have varying quality control, drawing processes, and annealing temperatures. A cheaper wire may contain more impurities or surface contaminants from the manufacturing process, which burn off and create a metallic taste.
– Wire Manufacturing Analysis, Best Vape Wire Brands for Coil Building & Vaping in 2025
Achieving mechanical purity is a ritual. It involves a strict pre-build protocol to ensure that the only thing you’re vaporising is your e-liquid. This systematic approach eliminates the variables that introduce off-tastes.
Your Checklist for Achieving Mechanical Purity
- Pre-Build Hand Hygiene: Wash hands thoroughly with unscented soap before handling wire to remove skin oils.
- Wire Degreasing: Wipe the length of wire you intend to use with an isopropyl alcohol pad before you even start wrapping. This removes manufacturing residue.
- Quality Wire Sourcing: Invest in wire from reputable brands known for consistent quality control. It makes a tangible difference.
- Meticulous Glow Test: Perform a careful, pulsed glow test. This not only checks for hotspots but also burns off any final, trace impurities in a controlled way before wicking.
- Even Post Tension: Ensure your post screws are tightened evenly. Uneven tension can create micro-hotspots where the wire degrades, forming metallic oxides that you can taste.
By treating your build process with this level of discipline, you elevate it from a simple task to a true craft. You are no longer just assembling parts; you are preparing a clean canvas, ensuring that the only taste you experience is the pure, unadulterated flavour of your chosen e-liquid, exactly as its creator intended.