A new coil tasting burnt immediately is not a sign of a faulty product, but a symptom of a preventable ‘catastrophic failure’ during the installation and priming phase.
- Uneven cotton saturation, even on a microscopic level, is the primary cause of the instant, acrid burnt taste.
- Mechanical stress from over-tightening and improper storage can pre-damage a coil before it ever sees e-liquid.
Recommendation: Treat every new coil installation like a precise, methodical process—from priming to the first test fire—to guarantee consistent flavour and performance.
There is no greater frustration for a vaper than the acrid, throat-scorching taste of a burnt hit from a brand new, freshly installed coil. You’ve spent good money on quality hardware, only for it to fail on the very first puff. The common advice is often simplistic: « You just need to prime it. » But you did prime it. You waited. And still, that foul, burnt taste ruins your e-liquid and your experience. This guide will not repeat those generic platitudes. Instead, we will treat this as a crime scene.
The immediate burnt taste is evidence of a critical error, a ‘catastrophic failure’ that occurred in the minutes leading up to that first press of the fire button. It’s rarely a faulty coil; more often, it’s a subtle mistake in technique. We’ll move beyond the ‘what’ and delve into the ‘why’. We’ll explore the physics of saturation debt, the dangers of mechanical stress from simple over-tightening, and the invisible environmental contamination that can ruin a coil while it’s still in the blister pack. By understanding the precise mechanisms of failure, you can develop a methodical, foolproof installation process.
This article will guide you through a complete diagnostic, from identifying the correct waiting times to mastering advanced priming techniques for different coil types. By the end, you’ll be able to not only prevent burnt hits but also understand exactly why they happen, turning frustration into mastery.
Summary: Diagnosing and Preventing Instant Burnt Coil Taste
- How Long Should You Wait After Installing a New Coil Before Vaping?
- How to Know Whether a Coil Will Fit Your Tank Without Wasting Money?
- How Tight Is Too Tight When Screwing in Your New Coil?
- The Storage Mistake That Ruins Unopened Coils Before You Use Them
- How Many Millilitres of E-Liquid Should One Coil Last in Normal Use?
- How to Prime a New Coil in 5 Minutes Without Wasting E-Liquid?
- The Mesh Coil Priming Mistake That Burns £5 Coils in One Puff
- Why Does Your Coil Burn Out in 4 Days When Others Last 3 Weeks?
How Long Should You Wait After Installing a New Coil Before Vaping?
The classic « wait 5-10 minutes » advice is a dangerous oversimplification. The correct waiting time is not a fixed number but a variable dependent on your e-liquid’s viscosity, ambient temperature, and the coil’s design. The goal is not to wait for a timer, but to wait for full saturation. A coil can feel wet on the outside while harbouring a dry pocket deep within the cotton, leading to instant burning. This state is known as a ‘saturation debt’, where the wicking material hasn’t absorbed enough liquid to handle the initial thermal shock.
A more reliable method is the « bubble test. » After filling the tank, watch the wicking ports on the side of the coil. You should see small air bubbles escaping as the cotton absorbs the e-liquid. When these bubbles stop appearing, it signifies the initial phase of saturation is complete. However, this is just the starting point. For high-VG liquids (above 70% VG), which are thicker, you must add more time. A good rule of thumb is to add five extra minutes for every 10% VG above 50%, and another five if you are in a cold environment which further increases viscosity. According to vaping hardware manufacturers’ own guidelines, a minimum of 5-10 minutes is the absolute baseline, but real-world conditions demand a more patient approach.
To actively speed up this process and ensure even saturation, you can perform primer puffs. With the airflow fully closed, take 3-5 short, sharp inhales on the drip tip without firing the device. This creates negative pressure, actively pulling liquid from the tank into the cotton core. After this, wait the appropriate time before your first vape. Always start at the lowest recommended wattage for your coil and gradually increase to your desired level over the first few puffs. This gentle introduction to heat allows any remaining semi-saturated spots to wick properly before being subjected to full power.
How to Know Whether a Coil Will Fit Your Tank Without Wasting Money?
Coil compatibility is a minefield for vapers. A coil that looks right can be a fraction of a millimetre off, leading to leaking, poor connection, or a complete inability to assemble your tank. Wasting money on incompatible coils is a common and frustrating experience. The primary reason for this confusion is the rise of « coil ecosystems. » Brands like Vaporesso (GTX), VOOPOO (PnP), and Geekvape (Z-Series) create a single coil design that fits a vast range of their own devices. While this is convenient if you stay within one brand, it creates chaos when trying to mix and match.
Before buying, your first step is to identify the exact name of your tank, not just your mod. For example, a « SMOK Morph 2 Kit » could come with a « TFV18 Tank, » and it’s the tank that dictates coil compatibility. The most reliable method is to consult a coil compatibility chart. These charts cross-reference the major coil platforms with the tanks they are designed for. They are an indispensable tool for any vaper who owns multiple devices.
The Hidden Cost of Counterfeit Coils
Beyond simple incompatibility, the market for counterfeit coils poses a significant risk. These clones often have poor printing quality, misaligned seals, and are sold at suspiciously low prices. The financial risk extends far beyond the cost of the coil itself. A poorly sealed counterfeit can leak a full tank of premium e-liquid, or worse, cause a short that damages your device. Retailer reports indicate that using community-sourced databases, such as the wiki on the Reddit r/Vaping forum, often provides more accurate real-world compatibility information than the manufacturers’ specifications alone, especially for identifying fakes.
The following table provides an overview of some of the most common coil ecosystems and their typical compatibilities. Always use this as a starting point and double-check with your retailer before purchasing.
| Coil Ecosystem | Primary Brand | Compatible Tank Examples | Cross-Brand Compatibility |
|---|---|---|---|
| Vaporesso GTX | Vaporesso | XROS series, Gen Air 40, Luxe Q/QS | 15+ devices across multiple product lines |
| SMOK Baby Beast | SMOK | TFV8 Baby, TFV8 Big Baby Beast, Baby Prince, Stick V8 Baby | Limited to SMOK Baby series only |
| Geekvape Z-Series | Geekvape | Zeus Sub-ohm Tank, Z-series compatible devices | 510 threading allows use on other brand box mods |
| VOOPOO PnP | VOOPOO | Drag series, Vinci series pods | Multiple VOOPOO device generations |
| Aspire Nautilus | Aspire | Nautilus, Nautilus 2, Nautilus GT | BVC coils across Nautilus family |
How Tight Is Too Tight When Screwing in Your New Coil?
The act of screwing in a new coil is often rushed, but it’s a moment where significant damage can occur. The common mindset is « tighter is better » to prevent leaks, but this introduces mechanical stress that can ruin both the coil and the tank. The correct tightness is « finger-tight, » a subjective term that we can define with more precision. The goal is not to weld the components together, but to achieve a perfect seal by properly compressing the rubber O-rings without deforming them.
When you over-tighten a coil, you risk several types of failure. You can crush or tear the delicate O-rings, which are essential for preventing leaks. A deformed O-ring will create a gap, allowing e-liquid to seep out. Secondly, you can strip the threading on the coil or the tank’s base. This is especially true with modern devices where parts are made from softer metals. A stripped thread means the component is permanently damaged. Finally, over-tightening can constrict the coil housing, putting pressure on the internal cotton and hindering its ability to wick e-liquid efficiently, creating an artificial dry spot that will burn on the first fire.
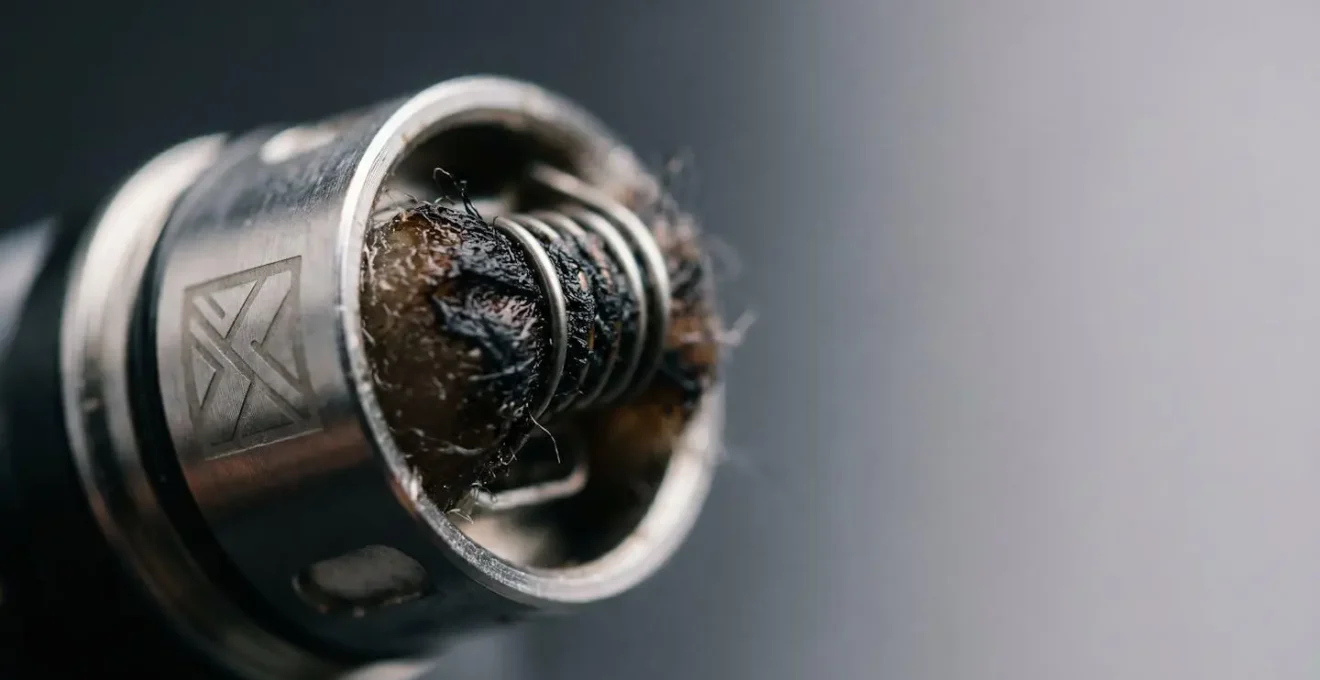
The image below illustrates the target for proper compression. You want the coil seated firmly, where the base makes full contact with the tank’s connector pin and the O-ring is visibly compressed but not flattened or bulging out of its channel.
A good technique is to screw the coil in until you feel the first point of resistance. This is the O-ring making contact. From that point, give it a final quarter-turn. No more. You don’t need tools or superhuman strength. Your fingers provide more than enough torque. A properly seated coil feels snug, not strained. Getting this feel right is a key part of mastering coil installation and preventing a host of problems before they even start.
The Storage Mistake That Ruins Unopened Coils Before You Use Them
One of the most insidious causes of a burnt or metallic taste from a new coil has nothing to do with priming or installation. It’s a problem of environmental contamination that occurs long before the blister pack is ever opened. Many vapers store their spare coils in a drawer in the bathroom or kitchen, unaware that these high-humidity environments are silently ruining their investment. A standard blister pack offers protection from dust and dirt, but it is not a hermetically sealed, long-term environmental shield.
Moisture in the air can, over time, permeate the packaging and cause microscopic levels of oxidation on the coil’s heating element, whether it’s Kanthal, stainless steel, or nickel. This is particularly true for mesh coils, which have a vastly larger surface area susceptible to this effect. When you vape on an oxidised coil, the result is an immediate and unpleasant metallic taste, poor ramp-up time, and a significantly reduced lifespan. The coil isn’t technically « burnt, » but the flavour is ruined from the first puff, and the coil’s performance is compromised.
The Deceptive Blister Pack: A Study in Oxidation
According to analysis from vape suppliers, high humidity is a primary culprit in premature coil failure. As detailed in a guide by VapeDirect, moisture leads to microscopic oxidation on heating elements even inside sealed packaging. This is a crucial point for vapers who buy coils in bulk to save money. The financial benefit is completely negated if half the coils degrade in storage before they are used. The effective shelf life of a coil is therefore directly tied to its storage conditions, not its manufacturing date. For bulk purchases, transferring coils from their retail packaging to a small, airtight container with a silica gel packet (the kind found in new shoe boxes) is an essential best practice.
The ideal storage location for your coils is a cool, dry, and dark place. A desk drawer in a bedroom or office is perfect. Avoid any area with frequent temperature fluctuations or high humidity. By treating your unopened coils with the same care as you would premium e-liquid, you eliminate a major variable that can lead to a disappointing vape experience. Your coils should be pristine when you open them, and proper storage is the only way to guarantee that.
How Many Millilitres of E-Liquid Should One Coil Last in Normal Use?
Coil longevity is one of the most debated topics in vaping, and the answer is frustratingly complex. While some vapers claim their coils last for weeks, others burn through them in 2-3 days. This huge variance isn’t due to faulty coils, but to the single most significant factor in coil lifespan: your choice of e-liquid. Specifically, the amount of sweetener, usually sucralose, in your juice is the primary determinant of how quickly your coil will degrade.
Sweeteners don’t vaporize cleanly. When heated, they caramelise and leave behind a black, sticky residue on the coil wire and in the cotton. This build-up, often called ‘gunk’, acts as an insulator, preventing the coil from heating e-liquid efficiently. It also clogs the cotton, hindering its ability to wick fresh liquid. The result is a muted flavour that quickly turns into a burnt taste as the coil starts to cook the residue instead of the liquid. In fact, some research shows that very sweet e-liquids can burn out coils within 2-3 days, compared to a normal lifespan of 7-10 days with less sweetened options.
To give a more practical measure than « days, » it’s better to think in terms of millilitres of e-liquid vaped. This removes variables like how frequently someone vapes. A high-quality coil used with an unsweetened or lightly mentholated e-liquid can last for 80-120ml or more. The same coil used with a rich, sweet dessert or candy flavour might only last for 20-40ml before the performance drops off a cliff. The table below illustrates the dramatic impact of sweetener content.
| E-Liquid Type | Sweetener Content | Expected Coil Life (ml) | Expected Coil Life (days) |
|---|---|---|---|
| Unsweetened/Menthol | None or minimal | 80-120ml | 7-14 days (average user) |
| Lightly Sweetened Fruits | Low sucralose | 50-70ml | 5-10 days |
| Rich Desserts/Candy | High sucralose | 20-40ml | 2-4 days |
| Premium No-Sweetener Blends | Zero added sweeteners | 100ml+ | 10-21 days |
How to Prime a New Coil in 5 Minutes Without Wasting E-Liquid?
The traditional method of priming—dripping e-liquid directly onto the cotton—can be messy and wasteful. It’s easy to over-saturate, causing flooding and gurgling, or under-saturate, leading to the dreaded instant burn. There is a cleaner, more efficient, and arguably more effective technique: the Zero-Waste Vacuum Priming Method. This method uses the physics of negative pressure to pull liquid into the coil evenly from all directions, ensuring a thorough and consistent saturation without a single wasted drop.
This technique is particularly effective because it mimics the natural wicking action of the coil during use, but in a controlled and accelerated way. By pulling liquid into the core from the tank, you ensure that the saturation happens from the outside-in, exactly as it’s designed to. This avoids the common error of having a wet centre and dry outer layers, a frequent cause of catastrophic failure with the dripping method. The process is simple, clean, and highly repeatable, making it an excellent addition to your coil-changing routine.
Here is the step-by-step process for the vacuum priming method:
- Install the new coil completely dry into the tank or pod.
- Fill the tank with your e-liquid to the maximum fill line.
- Assemble the tank and close the airflow control ring completely to create a sealed chamber.
- Without pressing the fire button, take 5-10 strong, firm inhales on the drip tip. This creates the vacuum.
- You are physically pulling e-liquid from the tank directly into the coil’s cotton wick.
- Open the airflow back to your preferred setting and let the device sit for 2-3 minutes for the final saturation to equalise.
- Begin vaping at 30-40% of the coil’s minimum recommended wattage, taking a few gentle puffs before increasing the power.
This method drastically reduces the chance of both dry hits and flooding. It’s a testament to the idea that the best solutions often work with the device’s intended function, rather than against it. It’s a quick, clean, and technically sound way to prepare your coil for its first fire.
The Mesh Coil Priming Mistake That Burns £5 Coils in One Puff
Mesh coils have revolutionised vaping with their incredible flavour and vapour production, but they come with a crucial vulnerability: they are extremely unforgiving of priming errors. The very properties that make them great—a massive surface area and incredibly low thermal mass—also make them susceptible to instant, catastrophic failure. A traditional round wire coil might survive a tiny dry spot for a second, but if even a square millimetre of cotton under a mesh strip is dry, it will burn instantly, permanently tainting the entire coil with an unfixable burnt taste. A £5 investment can be turned to ash in a single, careless puff.
This « surface area deception » is the key concept to understand. Because mesh heats up almost instantaneously across its entire surface, there is no margin for error. Any section of the cotton that isn’t fully saturated will not just burn, but superheat, creating a foul-tasting char that will be wicked into the rest of the cotton with every subsequent puff. This is why many vapers who are proficient at priming standard coils suddenly struggle when they switch to mesh. They are not prepared for its ruthless efficiency.
The Unforgiving Nature of Mesh
The large surface area of mesh is a double-edged sword. As explained in a detailed guide by VapeBeat, this feature, which makes them superior for flavour, also becomes their greatest weakness during priming. Uneven saturation causes immediate and permanent failure on the first puff. You cannot « vape through » a burnt spot on a mesh coil. The damage is done, and the coil must be replaced. This highlights the need for a specific, more meticulous priming technique tailored to mesh’s unique properties.
For mesh, a more deliberate « paintbrush » technique is required to ensure every part of the extensive wicking area is saturated. This is not a process to be rushed.
- Use the e-liquid bottle tip as a ‘paintbrush’ to gently spread a layer of liquid across the entire visible mesh strip inside the coil.
- Drip liquid through the top centre hole until you see the cotton become fully wet.
- Look at the wicking holes on the sides. Continue dripping liquid until these ports look glossy and can no longer absorb liquid quickly.
- After installing and filling the tank, perform a very low-wattage test fire. Set your device to 30-40% of the minimum recommended wattage.
- Pulse the fire button for just one second. Listen carefully. A soft, even sizzle is good. A sharp crackle or pop is a warning sign of a dry spot.
- Let the tank sit for a full 10-15 minutes after priming. This is not optional with mesh; it’s a crucial final step to allow any missed spots to saturate via capillary action.
Key Takeaways
- The immediate burnt taste is almost always a user-error in priming or installation, not a faulty coil.
- Factors like e-liquid sweetness, storage humidity, and over-tightening have a massive, often invisible, impact on coil life.
- Different coil types (standard vs. mesh) require entirely different priming techniques; a one-size-fits-all approach guarantees failure.
Why Does Your Coil Burn Out in 4 Days When Others Last 3 Weeks?
If you find your coils consistently burning out in just a few days while others boast of weeks-long performance, it’s time to become a detective. The lifespan of a coil is not a lottery; it is the cumulative result of multiple stress factors. By identifying and controlling these factors, you can dramatically extend the life of your coils. The primary culprits are well-known: e-liquid choice, wattage settings, and vaping habits. A coil’s life is a battle between the wicking material’s ability to stay saturated and the heat’s ability to create residue and damage.
As the editorial team at Vaping360 succinctly puts it in their guide, » Sweeteners are notorious for clogging coils and reducing their lifespan, and the thickness of VG only makes things worse. » This is the core of the issue. But it’s not the only factor. Constantly vaping at the upper limit of a coil’s recommended wattage range accelerates degradation exponentially. Likewise, ‘chain vaping’—taking multiple puffs with less than 15-20 seconds in between—doesn’t give the cotton enough time to re-saturate, leading to mini-dry-hits that caramelise liquid and build up gunk.
You can diagnose the stress on your coils by using a diagnostic matrix. By assigning points to each negative factor, you can get a clear picture of why your coils are failing prematurely. A high score (6+) reliably predicts a lifespan of just 3-5 days, while a low score (1-2) can see coils lasting for weeks under optimal conditions.
| Stress Factor | Point Value | Description | Impact on Lifespan |
|---|---|---|---|
| High-Sweetener Juice | +3 | Dessert, candy flavours with sucralose | Reduces life by 60-70% |
| Vaping at Max Wattage | +2 | Using top end of recommended range | Exponentially faster degradation |
| Chain Vaping | +2 | Less than 15 seconds between puffs | Cotton can’t re-saturate in time |
| High VG Juice (>70%) | +1 | Thick liquid, slower wicking | Increases residue buildup |
| Low Score (1-2) | – | Optimal conditions | 14-21 days typical lifespan |
| High Score (6+) | – | Multiple stress factors combined | 3-5 days typical lifespan |
Your 5-Point Burnt Coil Diagnostic Plan
- Identify variables: List your e-liquid (brand, flavour, VG/PG), hardware (coil, tank, mod), and user habits (wattage, puff frequency).
- Document your process: Write down exactly how you primed the coil, how long you waited, and the wattage of your first puff. Be honest and precise.
- Cross-reference specifications: Check if your wattage is within the coil’s recommended range and confirm the coil is officially compatible with your tank.
- Pinpoint the failure: Did the burnt taste occur on the very first puff (a clear priming/installation error) or develop over a day (a wicking/gunking issue)?
- Isolate the cause: Change only one variable at a time for your next coil. Use a different e-liquid, try the vacuum priming method, or start at a lower wattage to find the culprit.
Take control of your vaping experience. Instead of blaming the coil, begin today by applying this methodical, diagnostic approach to every coil change. By treating the process with precision, you can eliminate the frustration of burnt hits and ensure consistent, flavourful performance from every single coil.