The airy, unsatisfying draw from your vape isn’t a simple settings issue; it’s a failure of system calibration.
- A true cigarette-like draw depends on managing the entire airflow path, not just the external control ring.
- Internal airflow inserts, coil choice, and even the drip tip’s bore diameter are the critical components you need to engineer.
Recommendation: Stop randomly adjusting. Start thinking like an engineer and calibrate your device’s negative pressure system to precisely replicate the resistance you crave.
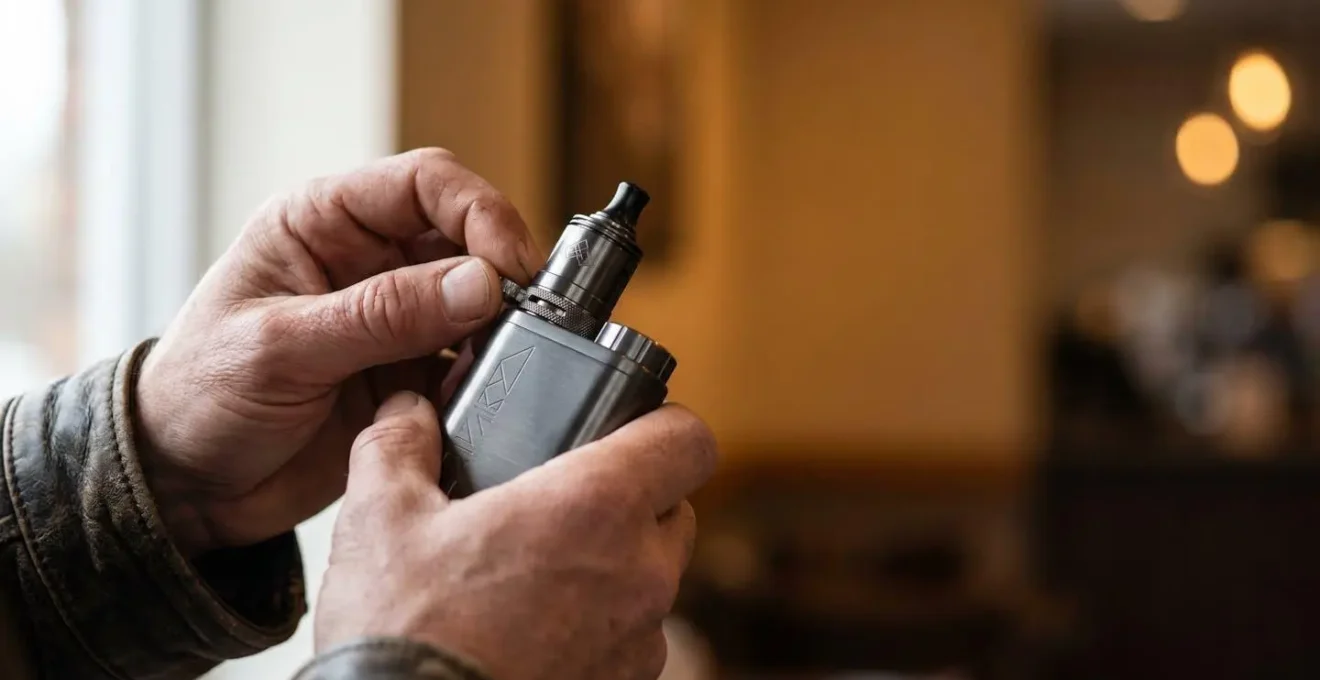
You take a drag from your new vape, expecting the familiar, satisfying resistance of a cigarette. Instead, you get a rush of air, a loose and hollow feeling that’s more like breathing through a wide straw. It’s a common and deeply frustrating experience for vapers transitioning from smoking. The standard advice is often a simplistic « just close the airflow, » but you’ve tried that. You’ve twisted the control ring from wide open to a pinprick, yet that tight, focused draw remains elusive.
The problem is that most advice misunderstands the fundamental physics at play. Achieving a cigarette-like draw isn’t about restriction alone; it’s an engineering challenge. It requires a holistic understanding of your device as a complete negative pressure system. The answer doesn’t lie in one single adjustment, but in the precise calibration of every component in the airflow path, from the air intake, through the coil chamber, and up to the mouthpiece.
This guide abandons the trial-and-error approach. We will dissect your vape from an engineering perspective, treating it as a system to be fine-tuned. We’ll explore the critical role of internal bore diameter, vapour-to-air ratios, and fluid dynamics. By the end, you will have the knowledge to stop wrestling with an airy vape and start meticulously engineering the tight, satisfying draw you’ve been searching for.
To fully grasp how to calibrate your device for the perfect draw, it’s essential to understand the interconnected components of the airflow system. This article breaks down each element, from flavour mechanics to the physical hardware that mimics a cigarette’s resistance.
Contents: Why Your Vape’s Draw is Too Loose
- Why Closing Your Airflow 50% Can Double Your Flavour Intensity?
- How to Match Your Airflow Setting to Your High-VG Cloud Chaser Liquid?
- Mouth-to-Lung or Direct-to-Lung: Which Airflow Matches Your Smoking Style?
- The Airflow Mistake That Floods Your Coil and Wastes E-Liquid
- When to Tighten Airflow: Morning Coffees vs Evening Relaxation Sessions?
- How to Find an MTL Tank With the Same Draw Tightness as Silk Cut Cigarettes?
- Wide-Open or 75% Airflow: Which Setting Actually Creates Denser Clouds?
- Why Can’t You Find a Vape That Feels as Tight as a Cigarette?
Why Closing Your Airflow 50% Can Double Your Flavour Intensity?
The relationship between airflow and flavour is a core principle of vape engineering. When you reduce the amount of air entering the system, you aren’t just making the draw tighter; you are fundamentally changing the airflow path velocity. Imagine a river flowing through a wide channel versus a narrow gorge. In the narrow gorge, the water speeds up. The same thing happens with air inside your atomiser. By restricting the airflow, you force the same volume of inhaled air to travel much faster over the surface of the coil.
This increased velocity has a direct impact on flavour pickup. The fast-moving air effectively « scrubs » more vapour and aromatic molecules from the heated coil and saturated wick. The result is a vapour stream that is less diluted by excess air. This concentration is the key to flavour intensity. As vaping hardware research shows, a more restricted airflow concentrates the vapor, making the flavour notes more pronounced and delivering a richer, more satisfying taste. It’s not magic; it’s a direct consequence of optimising the vapour-to-air ratio in favour of the vapour.
However, there’s a limit. Over-restricting the airflow can lead to the coil overheating, which can mute or even burn the flavour, producing a harsh taste. The goal is to find the « sweet spot » where the air is moving fast enough to concentrate flavour but still provides adequate cooling for the coil at your chosen wattage. This balance is the first step in calibrating your device for optimal performance.
How to Match Your Airflow Setting to Your High-VG Cloud Chaser Liquid?
Your choice of e-liquid introduces another critical variable into the airflow equation: viscosity. High-VG (Vegetable Glycerin) liquids, popular for their ability to produce large clouds, are significantly thicker and more viscous than their 50/50 or high-PG (Propylene Glycol) counterparts. This physical property has profound implications for wicking, especially when combined with a tight airflow setting.
The core of the issue is a conflict in fluid dynamics. A tight airflow, Mouth-to-Lung (MTL) setup is designed to create a strong negative pressure (vacuum) to pull vapour through a narrow channel. This process also generates significant heat in a small, enclosed space. As a case study on wicking failure highlights, using a thick, high-VG liquid in this environment is a recipe for disaster. The viscous liquid cannot travel through the small wicking ports of an MTL coil fast enough to replenish the cotton that is being rapidly vaporised. The wick dries out faster than it can re-saturate, leading to the dreaded « dry hit »—the acrid taste of burnt cotton.
This is where matching airflow to liquid type becomes non-negotiable. For high-VG liquids, you need a more open airflow setting (Direct-to-Lung or Restricted Direct Lung). The increased airflow serves two purposes: it helps cool the coil to prevent overheating, and it reduces the intensity of the vacuum, giving the thick liquid more time to wick properly. Conversely, for a tight, cigarette-like draw, you must use a thinner liquid, typically a 50/50 PG/VG blend, which can keep up with the fast wicking demands of a high-heat, high-vacuum MTL setup.
Case Study: High-VG Wicking Failure in Tight MTL Setups
Using small MTL coil heads to vape high VG e-liquid causes wick burning because the thick liquid cannot enter smaller wicking ports fast enough to keep the wick saturated during vaping. When paired with tight airflow creating high heat and strong negative pressure, the wick dries faster than the viscous liquid can replenish, resulting in inevitable burnt hits. The only viable solution is switching to 50/50 PG/VG liquid for MTL devices or opening airflow substantially for high-VG use.
Mouth-to-Lung or Direct-to-Lung: Which Airflow Matches Your Smoking Style?
Your personal inhalation style, developed over years of smoking, is the most important factor in determining your ideal airflow configuration. Vaping styles are broadly categorised into three main types: Mouth-to-Lung (MTL), Direct-to-Lung (DTL), and a hybrid style, Restricted Direct Lung (RDL). Each corresponds to a different airflow engineering philosophy and aims to replicate a different type of draw.
MTL (Mouth-to-Lung) is the style that most closely mimics the act of smoking a cigarette. You first draw the vapour into your mouth, hold it for a moment, and then inhale it into your lungs. This requires a tight, restricted airflow to create the necessary resistance and vacuum. This is the setup for vapers seeking high nicotine satisfaction and a distinct « throat hit. »
DTL (Direct-to-Lung) is the opposite. It’s like taking a deep breath directly from the device. This style requires a wide-open, airy draw with very little resistance, allowing for the inhalation of large volumes of vapour. It’s favoured by « cloud chasers » and those who prefer lower nicotine strengths and a smoother experience.
The table below breaks down the technical specifications for each style, providing a clear engineering blueprint for calibrating your device.
| Vaping Style | Airflow Setting | Coil Resistance | Wattage Range | Nicotine Strength | Smoking Equivalent |
|---|---|---|---|---|---|
| MTL (Mouth-to-Lung) | Tight, restricted | ≥ 0.8 ohms | 8-18W | 12-20mg salts | Short, sharp puffer (classic smoker) |
| RDL (Restricted Direct Lung) | Medium, balanced | 0.6-1.0 ohms | 18-30W | 4-12mg | Long, steady inhaler (modern smoker’s draw) |
| DTL (Direct-to-Lung) | Wide open, airy | < 0.6 ohms | 30-80W+ | 0-8mg | Deep breath style (not cigarette-like) |
A vaping style technical guide from Neon R Vape offers a perfect summary of the middle ground. As they explain in their MTL vs DTL guide:
RDL sits between the two. It’s for people who find MTL too tight but DTL too overwhelming.
– Vaping style technical guide, Neon R Vape – MTL vs DTL Guide
Choosing the right style isn’t just about preference; it’s about matching the device’s engineering (coil, wattage, airflow) to your desired physiological experience.
The Airflow Mistake That Floods Your Coil and Wastes E-Liquid
While many vapers struggle with a draw that’s too airy, the opposite problem—a flooded coil—can be just as frustrating. Flooding occurs when excess e-liquid accumulates in the coil chamber, leading to a gurgling sound, spitback (hot liquid droplets entering your mouth), and significant leaking. The common culprit is often counter-intuitive: an airflow that’s too open combined with an inhalation style that’s too timid.
From an engineering perspective, flooding is a failure of the negative pressure system. When you inhale, you create a vacuum that draws both air and vapour from the atomiser. If your draw is too weak or hesitant on a device with wide-open airflow, you fail to create enough vacuum to effectively vaporise the liquid being fed to the coil. Gravity and capillary action continue to pull liquid into the wick, but without a strong, consistent airflow and sufficient power, the liquid overwhelms the coil instead of being turned into vapour. It’s a simple case of input (liquid) exceeding output (vapour).
Another cause is over-zealous priming or leaving the device sitting for long periods. However, if you’re experiencing persistent gurgling, it’s likely a system imbalance. Resetting the coil chamber and re-calibrating your settings is the only effective solution. The following protocol will help you clear a flooded coil and prevent it from happening again.
Your action plan: Complete Coil Reset Protocol for a Flooded Chamber
- Remove the tank completely from the device and set the device aside safely.
- Cover all airflow holes with your finger or tissue, then blow firmly through the drip tip to expel excess liquid from the coil chamber.
- Fire the coil in 1-2 second pulses (without inhaling) to vaporize remaining excess liquid—repeat 3-4 times with 5-second gaps.
- Re-adjust airflow to a more balanced setting (50-60% open) before attempting to vape again.
- Take the first few puffs gently to allow the wick to find equilibrium with the new airflow setting.
By following this procedure, you are forcefully resetting the equilibrium of your device’s fluid dynamics, clearing the excess and establishing a new, more stable baseline for operation.
When to Tighten Airflow: Morning Coffees vs Evening Relaxation Sessions?
Advanced vape calibration goes beyond a « set it and forget it » mentality. It involves dynamically adjusting your airflow to suit specific situations and desired effects, much like choosing a different coffee blend for the morning rush versus a relaxing evening. The primary drivers for this are nicotine delivery speed and flavour intensity.
Think of your morning coffee ritual. You likely want a quick, potent caffeine hit to start your day. The same logic applies to vaping. For that first vape of the day, a tight, MTL airflow is superior. As research on airflow and nicotine delivery shows, this setup excels at delivering high-nicotine e-liquids (like nicotine salts) with a strong throat hit, resulting in a rapid and satisfying nicotine uptake that effectively curbs cravings. The flavour is also more concentrated and intense, pairing perfectly with the strong notes of coffee.
In contrast, an evening relaxation session calls for a different engineering approach. Here, the goal isn’t a sharp nicotine spike but a smoother, more prolonged, and flavourful experience. A looser RDL or DTL airflow is ideal. This allows for the use of lower-nicotine liquids, as the slower, more gradual nicotine uptake is better suited for a relaxed setting. While the flavour may be less intense per puff, the sheer volume of vapour produced can create a rich, room-filling aroma, transforming the experience from a functional habit into a sensory indulgence.
Calibrating your airflow on a situational basis allows you to use the same device for entirely different purposes. It’s about understanding that a tight draw is a tool for efficiency and potency, while an open draw is a tool for volume and smoothness. Choosing the right tool for the job is the mark of a truly experienced vaper.
How to Find an MTL Tank With the Same Draw Tightness as Silk Cut Cigarettes?
For many, the ultimate goal of vape calibration is to precisely replicate the draw of their former cigarette brand. This isn’t a vague preference; it’s a specific engineering target. The satisfying resistance of a Silk Cut is measurably different from that of a Marlboro Red. Achieving this level of precision is impossible with a simple external airflow control ring. The real engineering happens at a much smaller scale.
As a technical specification review on the E-Cigarette Forum makes clear, the secret lies in a component that most standard vape kits lack:
The true source of a tight draw in high-end MTL atomizers isn’t the external ring, but interchangeable pins/inserts placed directly beneath the coil.
– MTL RTA technical specification, E-Cigarette Forum – Dvarw FL Facelift Review
These inserts are small cylinders with precisely drilled holes of varying diameters (e.g., 0.8mm, 1.0mm, 1.2mm). By installing one of these inserts, you are physically changing the internal bore diameter of the airflow path at its most critical point—directly under the coil. This is what creates the true, unyielding resistance that mimics a cigarette filter. The external airflow ring then becomes a secondary fine-tuning control.
To match a specific cigarette, you need to match its draw resistance to a specific insert diameter. Fortunately, the vaping community has done the work, creating conversion guides that map cigarette types to their corresponding airflow insert sizes. For a vaper in the UK looking to replicate the experience of smoking a light cigarette, this data is invaluable.
| Cigarette Type | Approx. Draw Resistance | MTL Airflow Insert Size | Vaping Experience |
|---|---|---|---|
| Unfiltered Camel / Roll-Your-Own | Very tight, restrictive | 0.8mm single hole | Cheek-puckering, intense throat hit |
| Marlboro Red / Full Flavor | Tight, moderate resistance | 1.0mm single hole | Classic cigarette draw, strong satisfaction |
| Silk Cut / Marlboro Lights | Moderate, smooth resistance | 1.2mm single hole | Lighter, more forgiving MTL draw |
| Ultra-Lights / Slim variants | Looser, minimal resistance | 3 × 0.8mm or 1.4mm+ | Transitional to RDL territory |
As the table shows, to replicate the moderate, smooth resistance of a Silk Cut, the engineering target is a single airflow insert with a 1.2mm diameter. This specific, data-driven approach is the only reliable way to achieve true replication.
Wide-Open or 75% Airflow: Which Setting Actually Creates Denser Clouds?
In the world of cloud chasing, there is a pervasive myth that maximum airflow equals maximum clouds. While it’s true that a wide-open airflow setting will produce a large *volume* of vapour, it often comes at the cost of *density*. From an engineering standpoint, the densest, most satisfying clouds are not created at 100% airflow, but at a more calibrated « sweet spot. »
The key principle is the vapour-to-air ratio. Vapour itself is dense. It’s the addition of air that gives it volume. When you set your airflow wide open, you are mixing a massive amount of cool, ambient air with the vapour produced by the coil. This creates a cloud that is large in size but often thin, wispy, and quick to dissipate. It’s high in volume but low in density.
To create denser clouds, you need to slightly restrict the airflow. By closing it down to around 50-75% open, you reduce the amount of diluting air while still providing enough to cool the coil and carry the vapour. This results in a more concentrated mixture—a better vapour-to-air ratio. The cloud may be slightly smaller in overall volume, but it will be noticeably thicker, milkier, and will linger in the air for longer. As airflow engineering principles demonstrate, this sweet spot provides optimal cooling while maintaining the concentrated, dense vapor that many vapers find more satisfying.
Cloud Density Versus Cloud Volume Testing
Vaping analysis reveals that widening airflow generates cooler vapor with less flavor but larger volume, while narrowing airflow results in denser, more concentrated vapor that intensifies flavor but reduces total volume. As noted by vaping analysts at Tablites, cloud chasers seeking massive clouds favor maximum airflow despite sacrificing flavor, while those seeking satisfying, thick clouds optimize density by slightly reducing airflow to 60-75% open, creating a harmonious balance between vapor richness and production.
Therefore, the answer to the question is clear: 75% airflow (or a similarly restricted setting) will almost always produce denser, more satisfying clouds than a wide-open setting. It’s a trade-off between sheer size and satisfying thickness.
Key takeaways
- True cigarette-like tightness comes from calibrating the entire airflow system, not just the external ring.
- The most critical component for a tight draw is the internal airflow insert/pin, which defines the minimum bore diameter.
- You must match your e-liquid’s viscosity (PG/VG ratio) to your airflow setting to prevent dry hits or flooding.
Why Can’t You Find a Vape That Feels as Tight as a Cigarette?
After all the calibration and tweaking, you may still find that even the tightest vape doesn’t perfectly replicate the feel of a cigarette. There is a fundamental, physical reason for this, rooted in the core design difference between the two systems. A vape is not a cigarette, and from an engineering perspective, they operate on different principles of fluid dynamics.
The core of this difference is explained perfectly in a hardware analysis on a popular vaping forum:
A cigarette’s draw resistance comes from smoke being pulled through a dense fiber filter. Most vapes, even MTL ones, are hollow tubes. The internal diameter of the device’s chimney is a fixed, physical limitation that most vapes cannot overcome.
– Vaping hardware engineering analysis, Vaping Forum – Pod Systems with Tight Airflow Discussion
This is the crucial point. A cigarette creates resistance by forcing air through a tortuous path of compressed fibres. A vape, even with a 0.8mm airflow insert, is still fundamentally a hollow tube. It can mimic the *level* of restriction, but not the *character* of the resistance. However, you can get remarkably close by applying all the engineering principles we’ve discussed into a single, unified system.
To build the ultimate cigarette-replicating machine, you must control every chokepoint in the system. This means using a dedicated MTL Rebuildable Tank Atomizer (RTA) with under-coil airflow inserts of 1.2mm or smaller. You must pair this with a simple, thin wire coil (like 28 gauge Kanthal) that heats up quickly in the restricted airflow. Critically, you must also replace the standard mouthpiece with a long, ultra-narrow bore 510 drip tip. The entire path, from inlet to outlet, must be engineered for restriction. Finally, this entire mechanical setup must be fed with a thin, 50/50 PG/VG e-liquid that can wick effectively under such high-vacuum conditions. It is only by controlling every one of these variables that you can overcome the hollow-tube problem and engineer a draw that is almost indistinguishable from a cigarette.
By adopting this engineering mindset, you move from being a passive user to an active calibrator of your own experience. It’s the most effective path to finally achieving that perfect, satisfying draw.