The random shutdowns and inconsistent performance of your vape are not random at all; they are direct symptoms of an unsophisticated chipset’s inability to manage power effectively.
- A cheap chipset struggles to deliver consistent voltage as the battery drains, leading to weak hits and premature cut-offs.
- Premium chipsets contain superior hardware and firmware logic that ensures stable power, accurate readings, and crucial safety protocols that prevent dangerous failures.
Recommendation: When choosing your next device, investigate the chipset’s reputation for power regulation and safety features, as this is a far better indicator of quality and longevity than brand name or price alone.
It’s a frustration many vapers know all too well. You take a puff from your £15 vape, and it just… stops. No warning, no reason. Meanwhile, your friend’s £50 device works flawlessly from the first hit to the last, day in and day out. The common advice is often a shrug: « You get what you pay for, » or « It’s probably the battery. » While battery health is a factor, it rarely tells the whole story. The real difference, the unseen intelligence that separates a reliable workhorse from an erratic paperweight, lies hidden on a small circuit board.
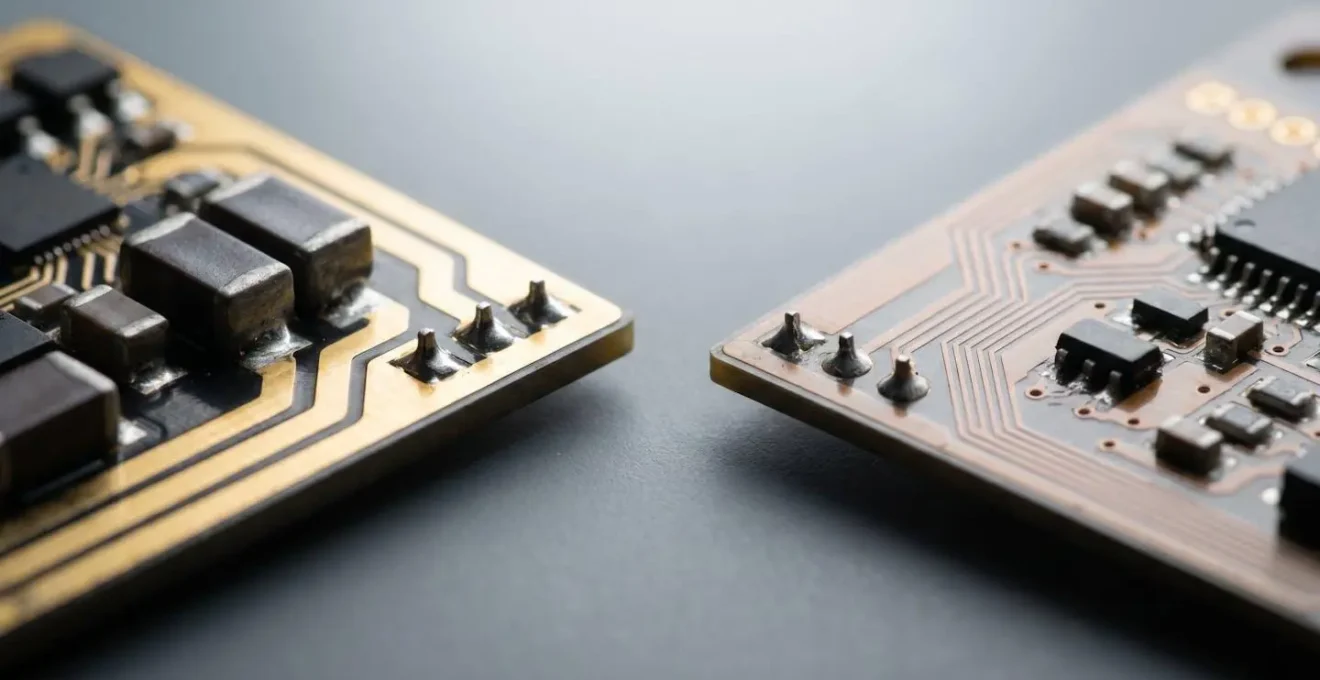
The world of vape mods is governed by an unsung hero (or villain): the chipset. This tiny electronic brain is responsible for everything from firing the coil to displaying your battery life and, most importantly, keeping you safe. Many users focus on external factors like tank capacity or aesthetic design, but these are secondary. The core experience—the consistency of the vapour, the reliability of the power, and the device’s ability to fail safely—is dictated entirely by the quality of its internal electronics.
But what if the key to understanding your device’s failures wasn’t in buying the most expensive model, but in understanding the engineering principles behind its operation? This article isn’t a buyer’s guide. It’s an engineering breakdown. We’re going to move beyond the marketing and look at the technical reasons for device failure. We’ll explore why some chips provide a perfect hit every time while others falter, what those cryptic error codes actually mean, and how the firmware you install can be the difference between a high-performance device and a permanently bricked £80 mod.
This guide will equip you with the knowledge of a vape electronics engineer. By understanding the core functions and failure points of different chipsets, you’ll be able to diagnose issues, spot dangerous counterfeits, and make informed decisions based on technical merit, not just price tags. Let’s look inside the machine.
Summary: Decoding the electronics that define your vape’s performance and safety
- Why Cheap Chipsets Deliver Weak First Puffs and Burnt Final Puffs?
- Gene Chip vs Omni Board: Which Chipset Has Fewer Failures After 2 Years?
- What Does Error Code « Check Atomizer » Actually Mean on Your Mod?
- The Counterfeit Chipset Signs That Put Your Face at Explosion Risk
- How to Access the Hidden Puff Counter and Usage Statistics on Your Mod?
- The Firmware Update Mistake That Permanently Destroys £80 Box Mods
- Which Budget Mod Chipset Delivers Reliable TC Under £50?
- Why Does Temperature Control Keep Your Coil From Burning Even When Dry?
Why Cheap Chipsets Deliver Weak First Puffs and Burnt Final Puffs?
The classic symptom of a low-quality chipset is inconsistent power delivery. You experience a weak, unsatisfying first puff when the device is cold, and a harsh, almost-burnt final puff as the battery depletes. This isn’t your imagination; it’s a direct result of poor power regulation and a phenomenon known as « voltage sag. » A fully charged 18650 battery might read 4.2 volts, but as soon as you fire the device, that voltage drops. A cheap chipset cannot compensate for this drop, delivering less power than requested.
Conversely, as the battery nears the end of its charge cycle, its voltage is naturally much lower. A basic chipset will struggle to boost this low voltage back up to the level you’ve set, often overcompensating and delivering uncontrolled power spikes that scorch your wick. It’s a hallmark of inefficient electronics. In contrast, high-end chipsets are built with superior components and more sophisticated firmware logic. As a result, premium chipsets like the Evolv DNA achieve a power efficiency rating of around 97%, meaning they deliver exactly the power requested, consistently, throughout the battery’s entire discharge curve.
This visual metaphor of voltage sag demonstrates why consistency is key. A premium chip smooths out this curve, ensuring the power you get on the last hit is identical to the first. As the VapeBeat Editorial Team notes in their analysis, even with good batteries, many cheaper dual-battery mods fail at completely maintaining consistent power delivery as the batteries wind down. This is the fundamental difference: a cheap device fights a losing battle against physics, while a quality device uses superior engineering to control it.
Gene Chip vs Omni Board: Which Chipset Has Fewer Failures After 2 Years?
When comparing popular chipsets like VooPoo’s Gene and Vaporesso’s Omni Board, vapers often focus on firing speed or feature sets. From an engineering perspective, however, the more important question is long-term reliability and failure rate. While both are considered excellent for their price point, their long-term performance is a story of component integrity and firmware maturity. A chipset is only as strong as its weakest capacitor, solder joint, or line of code.
It’s a common misconception that newer is always better. As one reviewer noted when comparing the Omni board to established leaders, « YiHi and DNA are more mature, and this plays a major part in why they’re currently the top dogs. » Maturity in this context means years of real-world data on component stress, thermal performance, and firmware bugs. This allows engineers to refine board layouts and patch vulnerabilities that only appear after thousands of hours of operation. The Gene and Omni chips have rapidly improved, but they haven’t yet accumulated the decade-plus of refinement that a chipset like the DNA has.
The most critical factor in long-term reliability is how the chipset is designed to fail. A quality chip has predictable and safe failure modes. It’s designed to protect the user above all else.
Case Study: Lost Vape’s Failure Mode Analysis
A technical analysis from Lost Vape in 2025 revealed that chipset malfunctions are the leading cause of vape mod failures. The study identified common failure modes, including power regulation errors (often displaying an ‘E7’ code), sensor communication breakdowns (‘E4’/’E5’), and total chipset communication failure (‘E1’/’E2’). Crucially, the analysis showed that premium chipsets with higher-quality components are designed to fail safely by becoming unresponsive. In contrast, budget alternatives have a higher risk of failing in an « on » state, leading to dangerous auto-firing incidents.
So, which has fewer failures? The answer is less about the brand name and more about the engineering philosophy. A chipset that prioritizes safe failure modes and is built with components that can withstand thousands of thermal cycles will always be more reliable in the long run, regardless of the name stamped on it.
What Does Error Code « Check Atomizer » Actually Mean on Your Mod?
The « Check Atomizer » or « No Atomizer » error is one ofthe most common and frustrating messages a vaper can see. It’s the digital equivalent of a shrug. From an engineering standpoint, this message means one thing: the chipset cannot get a stable and valid resistance reading from the 510 connection. The mod’s brain is sending a signal down to the coil and is getting either no response or a response that makes no sense. The device then triggers this safety error to prevent it from firing into a potentially dangerous or unknown state.
There are several common culprits for this breakdown in signal processing, ranging from simple to complex:
- A Poor Physical Connection: This is the most frequent cause. E-liquid, dust, or pocket lint on the 510 pin of the mod or the atomizer can create an insulating layer, blocking the electrical signal. A loose or improperly installed coil can also be the cause.
- A Faulty Coil: The coil itself may be the problem. A broken wire inside the coil head, or a short circuit where the coil is touching the inside of its housing, will return an invalid resistance reading (either infinite or near-zero).
- A 510 Pin Issue: The mod’s spring-loaded 510 pin might be stuck in the down position, preventing it from making contact with the atomizer. On cheaper mods, this pin can wear out or fail over time.
- Chipset Failure: This is the least common but most serious cause. The circuitry within the chipset responsible for reading resistance may have failed. If you’ve tried multiple known-good atomizers and coils and cleaned all contacts, and the error persists, the chipset itself is likely the point of failure.
Essentially, the « Check Atomizer » message is your mod’s primary line of defense against electrical shorts and open circuits. While often a simple fix, it’s a critical safety feature. A device that *doesn’t* show this error when there’s a problem is the one you need to worry about, as it might attempt to fire into a short circuit—a major safety risk.
The Counterfeit Chipset Signs That Put Your Face at Explosion Risk
The danger of a counterfeit chipset isn’t that it might perform poorly; it’s that it lacks the genuine safety features that prevent catastrophic failure. A legitimate chipset from a reputable manufacturer is a complex system of protections. It has redundant checks for short circuits, overheating (thermal protection), reverse battery polarity, and over-discharge. A counterfeit chipset is a hollow imitation. It’s designed to look and function like the real thing on the surface but is completely missing this critical firmware logic for safety.
These fakes are often built with the cheapest possible components, poor soldering, and no quality control. The biggest risk is that they are programmed to fire, but not programmed to *stop* firing when something goes wrong. An auto-firing mod, where the device continues to supply power to the coil even after the button is released, is a classic sign of a failed or counterfeit chip. This can cause the batteries to overheat and enter thermal runaway, which is the primary cause of vape explosions.
Spotting a counterfeit can be difficult, as they are designed to deceive. However, there are red flags. Inconsistent power output, screen flickering, buttons that don’t respond correctly, and features like Temperature Control that don’t work at all are strong indicators. The most telling sign is the price. If you see a mod that typically sells for £80 being offered for £25, it is almost certainly a counterfeit or a clone with a dangerous, unregulated board inside.
Checklist: How to Spot a Potentially Unsafe Chipset
- Performance Check: Does the wattage feel wildly inaccurate? Does Temperature Control mode produce burnt hits? A genuine chip delivers precise, predictable performance.
- Firmware Verification: Can the device’s firmware be updated via the official manufacturer’s software? Counterfeits will fail this process or won’t be recognized at all.
- Physical Inspection: Look at the 510 connector and battery door. Are the materials flimsy? Are the threads rough? Poor external quality often reflects poor internal quality.
- Feature Test: Try to access advanced features like puff counters, custom power curves, or screen brightness controls. Fake chips often have non-functional menu options.
- Vendor Trust: Did you purchase from an authorized dealer or a random third-party marketplace? Reputable vendors are your first line of defense against counterfeits.
Ultimately, your safety depends on the tiny, unseen components on that circuit board. A counterfeit chipset removes all those protections, turning your vape into an unpredictable and potentially explosive device. It’s a risk that is never, ever worth the money saved.
How to Access the Hidden Puff Counter and Usage Statistics on Your Mod?
Many modern vape mods contain a wealth of hidden data, logged by the chipset, that can give you insight into your vaping habits. The most common of these is the puff counter, but more advanced chipsets can track total puff duration, average wattage, and even detailed usage logs. Accessing this information is rarely straightforward, as it’s typically hidden within a sub-menu to keep the main interface clean. While the exact method varies, the process is a good test of the chipset’s firmware logic and sophistication.
The access method is almost always a specific combination of button presses. Here are some of the most common patterns used by manufacturers:
- The Three-Click Menu: The most standard system. Pressing the fire button three times in quick succession often brings up the main menu, where you can navigate to ‘Settings’ or ‘Puff Info’.
- The Button-Hold Combo: A frequent alternative is to hold down the ‘+’ and ‘-‘ adjustment buttons simultaneously for a few seconds. On some devices, this directly displays the puff counter, while on others it enters a secondary settings menu.
- Fire and Adjust: Some mods require you to hold the fire button and one of the adjustment buttons (e.g., Fire and ‘+’) to access specific functions like locking the device or clearing the puff counter.
- Deep-Menu Navigation: On high-end chipsets like a DNA or YiHi, you often need to connect the device to a computer and use the manufacturer’s software (e.g., Evolv’s EScribe) to access the most detailed analytics and usage graphs.
The ability to find and navigate these menus is a good sign. If your device claims to have a feature but the menu system is buggy, non-responsive, or illogical, it’s a red flag about the quality of the firmware programming. On the cheapest devices, the puff counter may be a complete fabrication—a number that simply increases without being tied to any real usage data. A hidden puff counter that is accurate and easy to access (once you know the trick) is a small but significant indicator of a well-designed chipset.
The Firmware Update Mistake That Permanently Destroys £80 Box Mods
A firmware update seems like a simple process: connect your mod to a computer, run a program, and get new features or bug fixes. However, this direct interface with the chipset’s core programming is one of the riskiest operations a user can perform. A single mistake can turn a high-performance £80 box mod into a « bricked » paperweight, and the problem is almost always user error, not a fault of the hardware. The chipset is simply following instructions, and if you give it the wrong ones, the consequences are permanent.
The most common and devastating mistake is using the wrong firmware file. Manufacturers often release multiple, similar-looking devices that use entirely different hardware. Flashing the firmware for a « Model X Pro » onto a « Model X » can corrupt the bootloader, the foundational code that tells the chip how to start up. Without a valid bootloader, the chip doesn’t know what it is anymore. The screen will remain blank, and the computer will no longer recognize it. It’s the electronic equivalent of a brain transplant gone wrong.
Other critical mistakes that can brick a device include:
- Power Interruption: The update process involves erasing and rewriting the chip’s memory. If the USB cable is disconnected or the computer loses power midway through, the chip is left in a half-erased, half-written state—completely scrambled and unusable. Always use a reliable USB cable and ensure your computer won’t go to sleep during the update.
- Using a Damaged USB Port: A faulty USB port on the mod, often damaged from rough use or being used as the primary charging method, can lead to an unstable connection. This can cause data corruption during the transfer, resulting in a bricked device.
- Ignoring Instructions: Manufacturers provide specific instructions for a reason (e.g., « remove batteries before updating »). Ignoring these steps can prevent the chip from entering the correct update mode, leading to a failed flash.
The bottom line is that the firmware is the chipset’s soul. A successful update can improve performance and add features, but a failed one is irreversible. Unless you are addressing a specific, known bug or gaining a feature you absolutely need, the safest engineering advice is often to leave the factory-installed firmware alone.
Which Budget Mod Chipset Delivers Reliable TC Under £50?
Achieving reliable Temperature Control (TC) on a device under £50 is the holy grail for many vapers, and a true test of a chipset’s engineering. True TC is not a simple feature; it requires precise signal processing and a stable hardware platform. Many budget mods claim to have TC, but in reality, it’s often a poorly implemented, non-functional feature. So, how can you identify a budget chipset that actually delivers?
Instead of focusing on a specific brand name, which can change from model to model, it’s more effective to understand the technical attributes that enable good TC. A chipset that can do the following is more likely to perform well:
- Stable Resistance Locking: The foundation of TC is the ability to accurately read the cold resistance of the coil and lock it in. A reliable TC chip will have a clear, easy-to-use function for locking resistance and will hold that value consistently. If the locked resistance value fluctuates between puffs, the TC will be erratic.
- Smooth Power Throttling: Watch what the device does when it reaches the temperature limit. A poor TC chip will simply cut power abruptly, leading to a choppy, unpleasant vape. A good TC chip will smoothly throttle the power down, pulsing it to maintain the target temperature, resulting in a consistent and smooth hit.
- Support for TCR Values: The best TC chipsets, even in the budget category, allow you to input custom TCR (Temperature Coefficient of Resistance) values. This allows you to fine-tune the performance for specific alloys of wire (like different grades of Stainless Steel) and demonstrates a more sophisticated level of firmware.
While specific models are always changing, chipsets like Vaporesso’s OMNI Board and some versions of GeekVape’s AS chip have historically been praised for offering surprisingly good TC performance for their price. They succeed not because they are packed with features, but because they do the fundamentals well. They provide a stable platform for resistance reading and have well-programmed power-throttling algorithms. When searching for reliable budget TC, look for evidence of these core competencies in reviews, not just a checkmark next to « TC Mode » on the box.
Key Takeaways
- Your vape’s performance and safety are primarily governed by the quality of its internal chipset, not its price or brand.
- Consistent power regulation is the key feature of a premium chipset, preventing weak hits and ensuring a reliable experience throughout the battery’s life.
- Genuine, well-engineered chipsets are defined by their safety features and predictable failure modes; counterfeit or cheap chips often lack these, posing a significant risk.
Why Does Temperature Control Keep Your Coil From Burning Even When Dry?
Temperature Control (TC) vaping seems like magic: you can fire your device with a completely dry wick, and it won’t burn. This isn’t magic; it’s a practical application of physics and clever engineering by the chipset. The entire system works on a single, fundamental principle: the electrical resistance of certain metals changes in a predictable way as their temperature changes. The chipset doesn’t have a thermometer; it uses the coil itself as a sensor.
The process begins when you select a TC mode for a specific wire type, such as Stainless Steel (SS), Nickel (Ni200), or Titanium (Ti). Each of these metals has a known Temperature Coefficient of Resistance (TCR). This is a value that describes exactly how much its resistance will increase for every degree of temperature increase. When you first attach the cool, room-temperature atomizer, the chipset reads its baseline resistance and « locks » it.
When you press the fire button, the chipset does two things simultaneously:
- It sends power to the coil to heat it up.
- It continuously monitors the resistance of that same coil, thousands of times per second.
As the coil heats up, its resistance increases. The chipset compares the new, higher resistance to the original, locked cold resistance. Using the known TCR value for your chosen metal, the firmware performs a rapid calculation to translate this change in resistance into an accurate real-time temperature. When this calculated temperature reaches the limit you’ve set (e.g., 220°C), the chipset intelligently throttles or cuts the power to prevent it from getting any hotter. When you have a dry wick, the coil heats up extremely fast, its resistance spikes, and the chip cuts the power almost instantly—long before the cotton has a chance to combust. This is also what prevents the dreaded « dry hit » when your tank runs low on e-liquid. It’s the ultimate safety net, all made possible by the chipset’s ability to read, calculate, and react in milliseconds.
Armed with this engineering knowledge, your next device choice can be based on technical merit and proven performance, not just aesthetics or marketing claims. Understanding what happens inside the mod is the first step to achieving a safer, more consistent, and ultimately more satisfying vaping experience.