Muted flavour in high-VG e-liquids is rarely the fault of the juice, but a system failure where thick liquid can’t be properly vaporized by your coil.
- VG’s high viscosity requires more heat (wattage) and better wicking than thinner liquids, leading to a « viscosity mismatch » with incompatible hardware.
- The real flavour killer is often sweetener caramelization, a chemical process accelerated by improper heat application, not the VG itself.
Recommendation: To fix this, you must systematically align your coil’s mass, wattage, and airflow with the liquid’s physical properties to achieve system synergy.
You’ve spent good money on a top-shelf, 80VG e-liquid, lured by the promise of dense, billowing clouds and a smooth throat hit. You prime your new coil, fill your sub-ohm tank, and take a long, expectant draw. You’re anticipating a flavour explosion, a complex layering of dessert or fruit notes… and you get a whole lot of nothing. A vague sweetness, perhaps, but the vibrant taste profiled on the bottle is disappointingly absent. It’s a frustrating experience common among cloud chasers, and the usual advice starts flying: « It’s vaper’s tongue, » « change your coil, » or the classic, « you just need to steep it more. »
While those factors can play a role, they often miss the core of the issue. When a premium, high-VG liquid underperforms, the answer is rarely found in smelling coffee beans. What if the problem isn’t your taste buds or a single faulty coil, but a fundamental mismatch in the physics of your setup? The truth is, unlocking the full flavour potential in high-VG juice isn’t about chance; it’s about understanding the science. It’s about achieving a delicate system synergy between liquid viscosity, coil thermal mass, and the energy you apply.
This technical guide is your flavour-rescue mission. We will move beyond the platitudes and dissect the specific, solvable reasons your 80VG liquid tastes muted. We’ll explore the science of wicking, the precise wattage requirements, the real cause of coil degradation, and why your premium equipment might be working against you. By the end, you’ll be armed with the knowledge to diagnose your setup, make targeted adjustments, and finally unleash the intense, satisfying flavour you paid for.
This article breaks down the complex interplay between your hardware and high-viscosity e-liquids. The following sections will guide you through a complete system diagnosis to restore flavour and maximize performance.
Summary: Why Does Your 80VG Liquid Taste Muted Even Though It’s Premium?
- Why Thick VG Liquids Cause Dry Hits in Small Pod Coil Holes?
- How Much More Wattage Does 80VG Need Compared to 50/50 Liquid?
- 70VG or Max VG: Which Ratio Balances Clouds With Coil Longevity?
- Why Does High-VG Vaping Leave a Film on Your Car Windscreen and Glasses?
- How to Dilute Max-VG Liquid With PG for Use in a Pod System in a Pinch?
- Why Cloud Competitions Require Dual Coils at 0.1 Ohms Minimum?
- Why High-PG Liquids Cause Leaking Disasters in Sub-Ohm Tanks?
- Why Can’t You Blow Competition-Size Clouds Even With Premium Equipment?
Why Thick VG Liquids Cause Dry Hits in Small Pod Coil Holes?
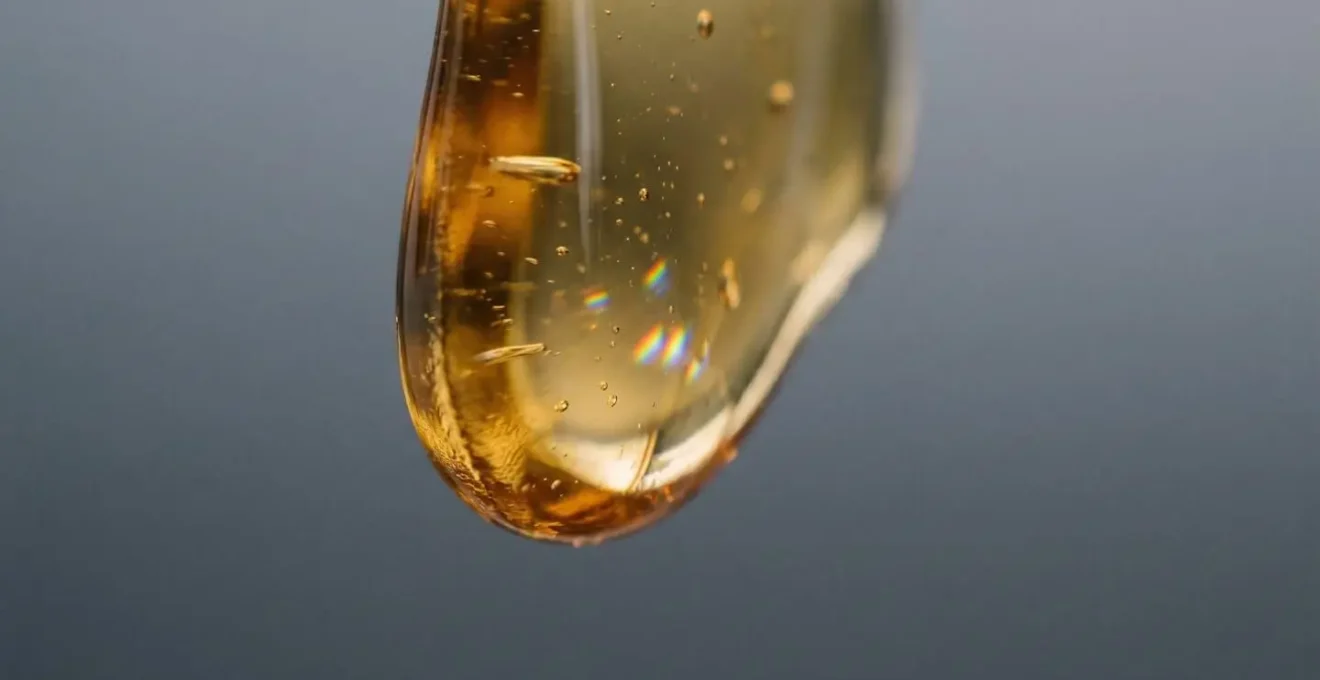
The primary culprit behind a muted, dry, or burnt taste when using high-VG liquid in a small device is a simple physics problem: viscosity mismatch. Vegetable Glycerin (VG) is significantly thicker and more syrupy than Propylene Glycol (PG). Pod systems, with their tiny coil heads and minuscule wicking ports, are engineered for thinner e-liquids that can flow quickly via capillary action. Your 80VG liquid is simply too viscous to keep up with the coil’s demand for juice, especially during chain vaping. The cotton wick cannot re-saturate fast enough, leading it to dry out and heat up, causing a dreaded dry hit that scorches the cotton and mutes any subsequent flavour.
This isn’t just theory; it’s a matter of fluid dynamics. Pod cartridges are designed for optimal performance with liquids in a specific viscosity range. In fact, recent laboratory measurements suggest an ideal viscosity of 1.5-3.0 cP for typical pod systems, a range perfectly suited for 50/50 or high-PG liquids. High-VG juice can be many times more viscous, creating a bottleneck at the wicking ports.
As the image above illustrates, the thick liquid struggles to penetrate the dense cotton fibres through the narrow entry points. This inefficient saturation has a direct impact on performance. As a technical analysis from Pen Vape explains, « Thick, high-viscosity e-liquids have lower vaporization efficiency, making it harder for your device to produce vapor consistently. » This inefficiency doesn’t just risk a dry hit; it means the coil is often only partially saturated, vaporizing a fraction of the liquid and thus delivering a weak, muted flavour profile. The system is essentially starving for fuel, even with a full tank.
How Much More Wattage Does 80VG Need Compared to 50/50 Liquid?
If you’ve moved from a 50/50 blend to an 80VG liquid and kept your wattage the same, you’ve already identified a major source of your muted flavour. High-VG e-liquids require significantly more power to vaporize effectively. This isn’t a matter of opinion; it’s a consequence of thermal physics. VG has a higher boiling point and greater density (or thermal mass) than PG. To bring that thicker liquid to the correct vaporization temperature and produce a dense, flavourful cloud, you need to apply more energy in the form of wattage.
A good rule of thumb is that a high-VG liquid requires approximately 25-40% more wattage than a 50/50 blend using the same coil resistance. Where a 0.5-ohm coil might sing with a 50/50 liquid at 35W, it would likely need 45-50W to properly atomize an 80VG juice. Without this extra power, the coil doesn’t get hot enough, fast enough. The result is a slow « cooking » of the liquid rather than a rapid flash-vaporization, leading to weak vapour production and a flat, underdeveloped flavour. According to industry guidelines, experts recommend a range of 50W-80W for 80/20 blends in most sub-ohm tanks, with mesh coils often performing best in the 80W-120W range.
Finding the perfect wattage for your specific liquid and coil is a process of discovery. The « Wattage Stepping » technique is the most effective way to dial in your flavour sweet spot without blindly pushing power and risking a burnt taste.
Your Action Plan: Finding the Flavour Sweet Spot with Wattage Stepping
- Start at the lowest wattage recommended for your coil (usually printed on the coil itself).
- Take a few puffs, then increase the power in small 2-3 watt increments, testing after each adjustment.
- Pay close attention to how the flavour profile changes. Stop when the taste is most intense and the vapour warmth is pleasant for you.
- If the vape becomes harsh or you taste any bitterness, you’ve gone too far. Immediately decrease the power by 2-3 watts.
- Note this « sweet spot » wattage; it’s the optimal power setting for that specific combination of juice and coil.
70VG or Max VG: Which Ratio Balances Clouds With Coil Longevity?
It’s a common belief in the vaping community that high-VG liquids are « coil killers. » The logic seems sound: thicker liquid works the coil harder, leading to a shorter lifespan. However, the choice between a 70VG and a Max VG (often 80% or higher) blend’s impact on coil longevity is more nuanced. The VG ratio itself is not the primary villain; the real culprit is often hiding in plain sight: sweetener content.
Vegetable Glycerin has a naturally subtle, sweet taste, but it’s a poor flavour carrier compared to Propylene Glycol. To compensate and create the bold, dessert-like profiles popular today, many manufacturers add significant amounts of sweeteners, most commonly sucralose. This is where the problem of « coil gunk » originates.
Sweetener Content is the biggest factor. E-liquids with added sweeteners leave more residue on the coil when heated. This residue, called coil gunk, builds up quickly and mutes flavor.
– Velvet Cloud Vaping Guide, How Long Do Vape Coils Last? A Comprehensive Guide
When heated, sucralose doesn’t vaporize cleanly. It undergoes a process called caramelization, leaving behind a dark, sticky residue that coats the coil and the wick. This gunk insulates the coil, preventing it from heating the liquid properly and physically blocking the wick from absorbing new juice. The result is a rapid decline in flavour and, eventually, a permanently burnt taste. Because high-VG liquids often need more flavouring to compete, they can sometimes contain higher concentrations of these sweeteners, creating a stronger association between VG and coil killing.
Case Study: The Real Coil Killer
In an analysis of coil degradation, researchers investigated the common assumption that higher VG burns coils faster. They found that, contrary to popular belief, coils used with clean, high-VG e-liquids actually showed less buildup than expected. The study concluded that the true problem is not the VG itself, but the high levels of sucralose and other sweeteners frequently added to commercial high-VG juices to boost their taste. This sweetener caramelization is the primary factor that shortens coil life, meaning an unsweetened 80VG liquid can be far kinder to your coils than a heavily sweetened 60VG liquid.
Therefore, the best way to balance impressive clouds with decent coil longevity is to choose a 70VG or 80VG liquid from a brand known for using minimal or no added sweeteners. The ratio becomes less important than the liquid’s actual composition.
Why Does High-VG Vaping Leave a Film on Your Car Windscreen and Glasses?
If you’re a high-VG vaper, you’ve undoubtedly noticed it: a persistent, hazy film that builds up on the inside of your car windscreen, your glasses, and your windows at home. This isn’t your imagination, and it’s a direct consequence of the chemical properties of Vegetable Glycerin. When you exhale a dense cloud of vapour, you are releasing a fine aerosol of microscopic VG, PG, flavouring, and water droplets into the air.
While PG and flavourings are quite volatile and dissipate quickly, VG is a different beast. As a humectant, VG is hygroscopic, meaning it attracts and holds onto water molecules from the air. It is also significantly less volatile than PG, so the droplets don’t evaporate easily. Instead, they drift through the air until they find a cool surface to condense upon, such as glass. Over time, these condensed droplets build up to form the greasy, semi-opaque film you see.
As explained by Biology Insights Research, the main culprit for the film’s persistence is clear: « Vegetable Glycerin is the main ingredient contributing to the thickness and stickiness of the residue because it is a highly viscous, syrupy liquid. » This sticky nature is why simply wiping it with a dry cloth often just smears the problem around. Removing the film requires a solvent that can break down the greasy glycerol.
While this residue is generally considered harmless, it can be an annoyance and even a safety hazard if it obstructs your vision while driving. Regular cleaning is the only solution. Standard glass cleaners are often ineffective, but a simple solution of soap and water or isopropyl alcohol works wonders.
- First, wipe the surface with a dry microfiber cloth to remove any loose dust.
- Mix a few drops of dish soap in warm water and apply it with a spray bottle or cloth. This will break down the greasy film.
- Wipe away the solution with a clean, dry microfiber towel.
- For particularly stubborn residue, a solution of 70% isopropyl alcohol is highly effective at dissolving the glycerol.
How to Dilute Max-VG Liquid With PG for Use in a Pod System in a Pinch?
You’ve found yourself in a bind: your main sub-ohm mod is out of commission, and all you have is your backup pod system and a bottle of your favourite 80VG liquid. As we’ve established, this is a recipe for dry hits and disappointment. In this emergency, you can rescue your vape by diluting your thick liquid with Propylene Glycol (PG) to make it more compatible with your pod’s wicking system.
This process is straightforward, but it requires care and precision. The most important rule is to only ever use pharmaceutical-grade (USP/EP) Propylene Glycol. Never use industrial PG or any non-certified source, as it can contain harmful impurities. You can purchase USP-grade PG from reputable vape supply stores. With the right ingredient, you can easily adjust your VG/PG ratio. For example, to turn 10ml of an 80/20 VG/PG liquid into a more pod-friendly 70/30 ratio, you would need to add approximately 1.5ml of pure PG.
After adding the PG, you must shake the bottle vigorously for at least two to three minutes to ensure the liquids are thoroughly mixed. It’s also best to let it sit for about 30 minutes to an hour to allow the mixture to settle. Be aware of the trade-offs: this dilution will proportionally reduce both the flavour concentration and the nicotine strength. In our example, you’d experience a reduction of roughly 15% in both. As a last resort, if you have no PG, you can add a very small amount of distilled water (0.5-1ml per 10ml), but this is less ideal as it can lead to spitting and further flavour dilution.
While this is a great emergency fix, it also opens the door to a wider world of customisation. As the team at Aspire notes, this simple act of modification is the first step toward true control. For « adventurous vapers, DIY e-liquid mixing opens a realm of possibilities. Crafting your blends allows precise control over PG/VG ratios, catering to your specific preferences. »
Why Cloud Competitions Require Dual Coils at 0.1 Ohms Minimum?
When you look at the specifications for cloud chasing competitions, you’ll see incredibly low resistance builds, often featuring dual coils coming in at 0.1 ohms or even lower. A common misconception is that the low resistance itself is the goal. In reality, the ultra-low resistance is a by-product of the true objective: maximizing the coil’s surface area. To produce competition-winning clouds, you need to vaporize a massive amount of liquid in a single, rapid burst. The only way to do that is to have as much hot metal touching as much saturated wick as possible.
This is achieved by using large, complex wires (like Fused Claptons, Aliens, or Staggered Staples) and building them into a dual-coil configuration. This sheer amount of metal has a huge surface area but also results in a very low electrical resistance. As one technical analysis puts it, « The low resistance is a by-product of using a massive amount of wire (dual, complex coils) to achieve maximum contact area with the e-liquid, vaporizing more of it simultaneously. »
Furthermore, this increased coil mass is a critical factor. These dense, intricate builds have substantially more metal to heat up than a simple round wire coil. This is why competition setups require extremely high wattage (often 150W-200W+) and powerful, high-amp batteries. The power isn’t just to overcome the low resistance; it’s to overcome the thermal inertia of the coils and bring that huge mass of metal to vaporization temperature almost instantaneously. As technical analyses on coil performance show, lower resistance allows more power to flow, which is necessary to vaporize thicker VG, but it’s the combination of massive surface area and the high wattage needed to heat the coil’s mass that generates championship-level clouds.
Why High-PG Liquids Cause Leaking Disasters in Sub-Ohm Tanks?
Understanding why 80VG liquid struggles in a pod system is the key to understanding its inverse: why a thin, high-PG liquid creates a leaky mess in a modern sub-ohm tank. It all comes back to engineering and viscosity. Sub-ohm tanks, designed for cloud chasing and high-power vaping, are built with the assumption that they will be used with thick, high-VG e-liquids. Consequently, their components are designed to facilitate the flow of this viscous liquid.
This means the juice flow channels and the wicking ports on the coil head are made deliberately large. These wide-open gates are necessary to allow thick, syrupy 80VG liquid to saturate the large cotton wicks inside, preventing dry hits at high wattages. However, when you introduce a thin, watery high-PG liquid (like a 50/50 or 30/70 VG/PG blend) into this system, those helpful large ports become a disastrous liability. The low-viscosity liquid has very little surface tension holding it together and it flows far too easily. As a guide from E-Liquids.com bluntly states, « As high PG e-liquids have a thinner viscosity, they can also cause leaks in higher-powered kits. »
The thin liquid essentially pours through the wicking ports, overwhelming the cotton’s ability to hold it. The coil chamber floods completely. This excess liquid has nowhere to go but out, seeping through the airflow holes at the base of the tank and creating a sticky, frustrating mess all over your mod and your hands. It’s not a fault of the tank; it’s a fundamental mismatch between a liquid’s properties and the hardware’s design. A sub-ohm tank is simply the wrong tool for a high-PG liquid, just as a small pod is the wrong tool for a high-VG one.
Key Takeaways
- High VG requires more wattage due to its higher thermal mass and boiling point; expect to use 25-40% more power than for 50/50 liquids.
- Sweeteners, not VG itself, are the primary cause of coil gunk and rapid flavour decline due to caramelization under heat.
- System synergy is paramount: your coil’s mass, wattage settings, and airflow must be correctly aligned with your liquid’s viscosity for optimal flavour.
Why Can’t You Blow Competition-Size Clouds Even With Premium Equipment?
You’ve got the dual-battery mod, the high-airflow RDA, the fancy alien coils, and the Max VG juice. You have all the « premium equipment, » yet your clouds are still leagues behind what you see from competitive cloud chasers. This is a common frustration, and it highlights the final, most important element in the cloud-chasing equation: system synergy and user technique. Having the right parts isn’t enough; they must be aligned and used correctly to achieve their full potential.
First, « premium » doesn’t always mean « aligned. » Your complex coils might have a high thermal mass that your wattage setting can’t overcome quickly enough. While technical specifications indicate a broad range of 40-100 watts for high-VG, a heavy build might need to be at the very top of that range, or even exceed it, to perform. If your wattage is too low for your coil mass, you’ll get lazy, wispy vapour, not a dense cloud. Secondly, airflow is critical. You need wide-open airflow on your tank or RDA to allow a massive volume of air to mix with the vapour, but it must be balanced with enough power to vaporize the liquid instantly.
However, the most overlooked factor is technique. Competitive cloud chasers practice a specific breathing method. It often involves a quick « purge » exhale into the device to pre-heat the coils, followed by a very fast, deep, direct-to-lung inhale, and finally a slow, controlled exhale to keep the vapour mass dense and prevent it from dispersing. Even atmospheric conditions play a role; vapour is far more visible in cool, dry air. To truly diagnose your setup and push it to its limits, you need to audit every single component of the system, from the batteries to your own breathing.
Your Action Plan: The System Alignment Checklist for Maximum Cloud Production
- Liquid: Is it truly Max VG (at least 80%)? Thinner liquids won’t produce the same density.
- Hardware: Are you using an RDA or a high-airflow sub-ohm tank with large surface area coils (dual coils are ideal)?
- Power Source: Are your batteries fully charged and rated for high-amperage (at least 25A continuous discharge)? Voltage drop from weak batteries can kill performance.
- Wattage: Is your power setting appropriate for your coil’s mass? For complex builds, start at 70-80W and increase until vapour is dense and warm.
- Breathing Technique: Practice the purge-inhale-exhale method. Inhale fast and deep, exhale slow and steady.
Stop guessing and start diagnosing. Use this knowledge to systematically audit your setup, align your components, and finally unlock the rich, dense flavour your premium liquids were designed to deliver. True vaping satisfaction comes not just from buying premium gear, but from understanding how to make it perform.